
.webp)
Checklist for Facebook Lead Ads API Setup


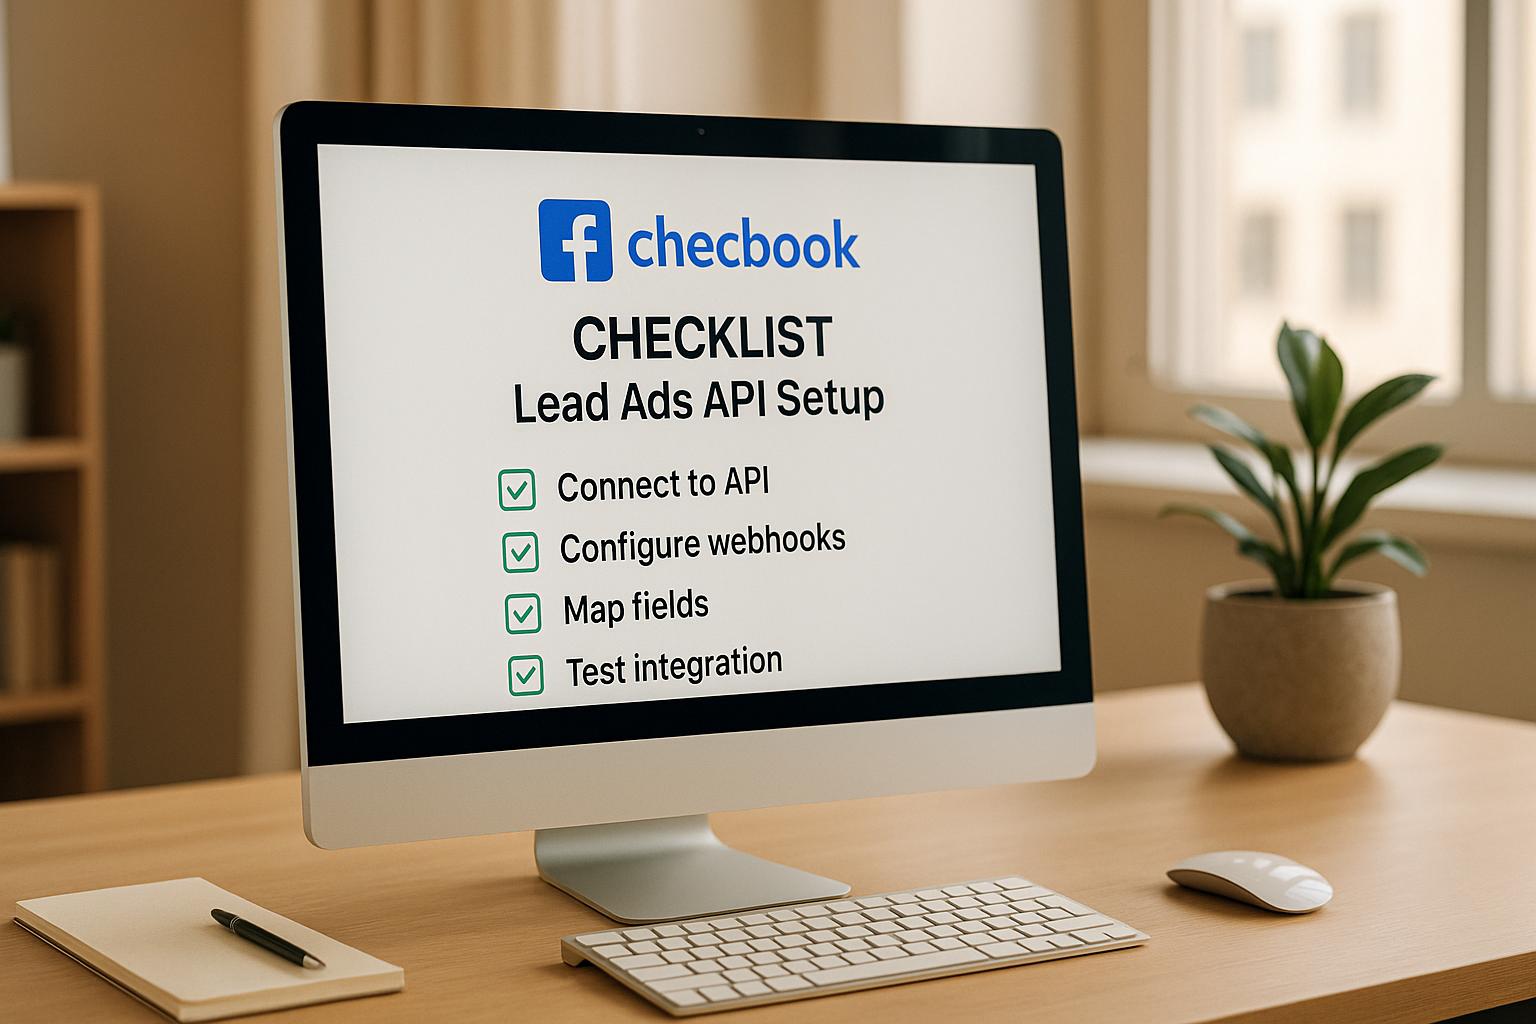
The Facebook Lead Ads API is a powerful way to automatically collect and manage leads from your campaigns. Setting it up correctly ensures smooth integration, better data accuracy, and compliance with privacy laws. Here’s what you need to know:
- Key Metrics: Conversion rates range from 8.78% to 9.21%, average Cost-Per-Click is $1.88, and click-through rates are 2.53%.
- Preparation: Verify Business Manager and Ads Account access, configure permissions (MANAGE, ADVERTISE, ANALYZE), and set up the Meta Pixel for tracking.
- Privacy Compliance: Include a clear Privacy Policy in your forms, comply with GDPR/CCPA, and use tools like Limited Data Use (LDU) for user consent.
- API Setup: Register your app with Facebook for Developers, configure OAuth 2.0 for secure login, and store access tokens securely.
- Testing: Use Facebook’s Lead Ads Testing Tool to verify data flow and troubleshoot.
- Performance Tracking: Monitor lead volume, transfer rates, data accuracy, and key metrics like CPL, CPA, and ROAS.
Proper setup avoids common pitfalls like permission errors or data loss, ensuring your campaigns run smoothly and effectively.
How to Use APIs to Connect Facebook Lead Ads with your CRM using Pabbly Connect
Requirements Before Starting API Setup
Before diving into the technical side of integrating Facebook Lead Ads API, there are a few essential steps to tackle first. These steps ensure a smooth setup process by confirming account permissions and setting up tracking tools properly.
Verify Access to Business Manager and Ads Account
To get started, you’ll need admin access to Facebook Business Manager. Without it, you won’t be able to configure system users or generate access tokens, which are critical for the API setup. Double-check that you have admin-level permissions in Business Manager, as only an admin can generate the necessary access token to set up system user permissions.
Once you’ve confirmed admin access, configure the system user for API calls. This user must have the following permissions on your ad account: MANAGE, ADVERTISE, and ANALYZE. Each permission serves a specific purpose:
- MANAGE: Grants the ability to modify account settings and manage user access.
- ADVERTISE: Enables campaign creation and management.
- ANALYZE: Provides access to reporting data.
Make sure all these permissions are in place to avoid hitting any roadblocks during API integration.
Set Up the Meta Pixel
The Meta Pixel is a small piece of JavaScript code that tracks user behavior, measures conversions, optimizes ad delivery, and builds audiences on your website.
"If you use Facebook ads, you need to use Facebook Pixel to measure the success of your campaigns. Deploying the Pixel on your website helps Facebook understand your website and how users interact with it. By extension, Facebook will understand how conversions happen on your website." - Analytics Mania
For a straightforward installation, consider using Google Tag Manager (GTM). Start by creating your Meta Pixel in Meta Business Suite. Head to Events Manager, click "Connect Data", select "Web", and choose "Meta Pixel." Name your Pixel and retrieve your unique Pixel ID. Then, in GTM, use the "Facebook Pixel Custom Template" from the GTM Community Template Gallery. Create a constant variable to store your Pixel ID, ensuring consistency across all tags.
Once the Pixel is installed, configure both basic PageView tracking and specific events like lead generation. Use Meta’s Standard Events, such as "Lead" for form submissions, and set up tags with precise triggers (e.g., thank-you page URLs or custom form submission events). For better audience targeting, enable Advanced Matching while ensuring compliance with Meta’s privacy policies and user consent requirements. You might also want to implement Meta’s Conversions API alongside the Pixel for more reliable data tracking, especially as browser-based tracking becomes less dependable.
Comply with US Privacy Laws
Facebook has strict privacy requirements, so having a clear Privacy Policy is a must for businesses using Facebook Lead Ads.
"You will ensure that each Lead Ad includes the following disclosures to Facebook users: (i) all disclosures and choice mechanisms necessary and sufficient to comply with applicable laws, rules and regulations... (ii) a clear and prominent disclosure that if a user submits data to you through a Lead Ad, such data will be governed by your privacy policy; and (iii) a link to your privacy policy." - Facebook Lead Ads Terms of Service
Your Privacy Policy should clearly explain how you collect, process, share, and protect user data for Facebook advertising purposes. It should outline the types of data collected (e.g., emails, phone numbers, cookies), how the data is used (e.g., for marketing or analytics), and whether it’s shared with third-party providers.
For compliance with California’s CCPA/CPRA, include an easy-to-find "Do Not Sell Or Share My Personal Information" option. While GDPR requires an opt-in consent model, most US privacy laws rely on an opt-out model. Additionally, use double opt-in for email forms to verify ownership, and activate Meta’s Limited Data Use (LDU) parameter to limit data processing for users who opt out.
When setting up Facebook Lead Ads, include your Privacy Policy link in the Instant Form editor in Ads Manager. Regularly review and update your policy to stay compliant. By meeting these requirements, you’ll be ready to securely access the API and capture lead data efficiently.
Creating Facebook API Access and Login Setup
To integrate your system with Facebook's Lead Ads data, you’ll need to register your app with Facebook. This step establishes the connection between your platform and Facebook’s API.
Create Your App on Facebook for Developers
The first step is registering your app with Facebook for Developers. Start by signing up as a Meta developer at https://developers.facebook.com. Once logged in, head to https://developers.facebook.com/apps/creation/ to begin the process of creating your app.
"Creating an app with Meta is a crucial first step for any developer looking to integrate with Meta's products, SDKs, or APIs. This process ensures your app is properly identified, configured, and authorized to interact with Meta's platform and services." - Meta
During the setup, you’ll need to provide an app name and a contact email. Pay close attention when selecting your use cases, as these determine the permissions and features available to your app. Options might include "Authenticate and request data from users with Facebook Login" or "Manage everything on your Page." Remember, these use cases cannot be changed later.
You’ll also decide whether to link your app to an existing business portfolio or create a new one. Once you’ve reviewed and confirmed the details, you’ll be redirected to the app dashboard. Here, you can find your App ID and App Secret under Settings > Basic. These credentials are essential for API authentication and the OAuth flow.
If your app will be publicly accessible, you’ll need to publish it by navigating to Publish > Go live. This process includes completing app review and passing business verification.
Set Up OAuth 2.0 Login
OAuth 2.0 is a secure way to authorize users without exposing their credentials. Facebook uses the "Authorization Code Grant" flow, which involves several key components: the user (Resource Owner), your app (Client), Facebook’s authorization server, and Facebook’s APIs (Resource Server).
Start by setting up your callback URL in the Facebook app control panel. Go to Facebook Login Settings and specify the "Valid OAuth Jump URI." This is the URL where Facebook will redirect users after they’ve granted permissions. Ensure it starts with https:// to maintain a secure connection.
Next, construct the OAuth URL (https://www.facebook.com/v19.0/dialog/oauth) with the necessary parameters like client_id, redirect_uri, and state. The state parameter is particularly important for preventing cross-site request forgery (CSRF) attacks, so make sure it’s unique and validated upon redirection.
Once users grant permissions, they’ll be redirected to your callback URL with an authorization code. Exchange this code for an access token by making a request to https://graph.facebook.com/v19.0/oauth/access_token with your client_id, client_secret, redirect_uri, and the authorization code. With the access token, you can make authenticated calls to Facebook’s Graph API, such as retrieving user data with https://graph.facebook.com/me?fields=id,name.
It’s worth noting that Facebook has updated its permissions system, requiring developers to complete Business Verification for full access to certain features. This step enhances security and ensures compliance.
Store Access Tokens Safely
Access tokens are like keys to sensitive user data, so securing them is critical. Never store access tokens on the frontend of your application. Instead, keep them on your backend server to reduce risks like cross-site scripting (XSS) attacks.
Here are some best practices for token security:
- Encryption: Use AES-256 to encrypt tokens and store them securely with tools like AWS Secrets Manager, HashiCorp Vault, or CyberArk Conjur.
- Short-Lived Tokens: Implement tokens that expire within 60 minutes and use refresh tokens for session continuity. Store refresh tokens securely on the server side.
- Principle of Least Privilege: Only grant tokens the permissions they absolutely need.
- Regular Rotation: Rotate access tokens and encryption keys periodically to limit exposure risks.
- Monitoring: Log and monitor API requests and token usage to detect suspicious activity in real time.
- Secure Transmission: Always use HTTPS (TLS/SSL) for data transmission to protect against interception.
For mobile apps, use the operating system’s secure storage options, like Keychain for iOS or KeyStore for Android. If you must store tokens client-side for web apps, use encrypted session cookies with httpOnly and SameSite attributes, alongside anti-CSRF protections.
Once your credentials are secure, you can move forward with connecting your Lead Ads forms to the API.
sbb-itb-5f36581
Connecting Lead Ads Forms to the API
Once you’ve secured your app credentials, it’s time to connect your Lead Ads forms directly to the API. This connection automates the process of capturing leads and integrates them directly into your systems, saving time and reducing manual effort. Here’s how to get started.
Set Up and Configure Lead Ads Forms
When designing your Lead Ads forms, focus on collecting essential information efficiently while ensuring they meet U.S. formatting standards. Begin by heading over to Meta Ads Manager or Meta Business Suite to create your forms.
You’ll have two main form options to choose from:
- "More Volume" Forms: These forms prioritize simplicity, allowing users to submit their information quickly. They’re ideal when your goal is to generate a high volume of leads.
- "Higher Intent" Forms: These include an additional step where users review and confirm their information before submitting. While they may result in fewer leads, the quality of those leads is often higher.
For U.S.-based audiences, ensure dates follow the MM/DD/YYYY format and phone numbers adhere to standard U.S. formatting. You can also make use of Facebook’s pre-filled fields for details like name, email, and phone number to streamline the user experience.
To further refine your forms, consider Facebook’s Flexible Form Delivery feature and optional SMS/OTP verification, which can help optimize layouts and reduce fraudulent submissions.
Make sure every form includes a clear link to your privacy policy. This transparency not only complies with U.S. privacy laws like the California Consumer Privacy Act (CCPA) but also builds trust with potential leads.
For mobile optimization, keep fields to a minimum - only collect what’s absolutely necessary. If you need additional information, use custom questions sparingly to avoid lowering completion rates.
Grant Lead Access Permissions
A smooth API integration hinges on having the correct permissions configured. The user responsible for the integration must be an Admin of the Facebook Business Page and have Lead Access Permission. You can set this up by navigating to Facebook Business Suite > Integrations > Leads Access > Assign CRMs.
"If these permissions were not correctly set, leads would not sync to the CRM. HighLevel provided a troubleshooting guide detailing steps to manually assign Lead Access permissions via Facebook Business Suite, emphasizing that the Page Admin who granted access must maintain it for continuous data fetching."
It’s crucial that the Page Admin who initially grants these permissions retains their admin status. If they lose access, the entire integration could fail.
Use Reform for Better Form Design

Once your lead form connections are configured and secured, you can take your strategy to the next level with Reform. This no-code, conversion-focused form builder is designed to help you maximize lead quality and improve completion rates.
Reform allows you to create visually appealing, branded forms that align with your Facebook Lead Ads strategy. Features like multi-step forms can break down complex requests into smaller, more manageable steps, increasing the likelihood of users completing the form. Conditional routing ensures that users only see questions relevant to them, creating a more personalized experience.
For those worried about lead quality, Reform includes built-in tools like spam prevention and email validation to ensure you’re collecting legitimate contact information. Plus, its lead enrichment features can automatically add extra context to submissions, giving your sales team valuable insights.
Reform also provides real-time analytics, so you can immediately identify where users are dropping off and make adjustments to improve performance. The platform integrates seamlessly with popular CRMs like HubSpot and Salesforce, as well as marketing automation tools via Zapier. Additional features such as abandoned submission tracking and A/B testing help you recover incomplete leads and continuously refine your forms for better results.
Testing and Tracking API Integration
Once your Lead Ads forms are connected to the API, the next step is testing. This ensures everything functions as expected before you start collecting real leads. Testing also helps identify potential issues early and sets up monitoring systems to keep things running smoothly.
Test API Connection and Data Collection
Facebook provides a handy Lead Ads Testing Tool that simulates lead submissions without affecting live campaigns. You can find it at Facebook Lead Ads Testing Tool (make sure you're logged into your account).
Here’s how it works:
- Select the Facebook Page and Lead Ad form you want to test.
- Use the "Preview Form" option to customize input fields, or let Facebook auto-generate fake test data.
- Click "Create Lead" to generate a test submission.
This test lead should show up in your CRM within minutes. If you're using an integration platform like LeadsBridge, check that the lead is marked as "Synced" in the Leads Table.
For custom integrations, use Graph API Explorer endpoints to fetch leads. Compare the returned JSON data with what you expect. To do this, ensure you’ve configured Page access tokens, user access tokens, and advertiser-level permissions correctly.
Keep in mind that Facebook's API can sometimes be inconsistent. As noted by an engineering team:
"the FB API is not very reliable API and we had multiple occasions where data was not returned multiple times and then suddenly it appeared in API responses after a few days"
Test your webhook setup by sending notifications to confirm accurate data capture. Regular monitoring of the data flow is key to ensuring leads are consistently transferred. Once testing confirms that everything works, you can move on to tracking performance.
Track Key Performance Metrics
After verifying the data flow, it's time to monitor key metrics to evaluate how well your setup is performing. Pay attention to the following:
- Lead Volume: The total number of leads successfully collected and transferred via the API.
- Transfer Rate and Latency: Check how quickly leads move from Facebook to your CRM to ensure timely follow-ups.
- Data Integrity: Confirm that all lead fields are transferred correctly without any loss or errors.
- Conversion Rate: Measure how many leads turn into sales, sign-ups, or other desired actions.
- Cost Per Lead (CPL) and Cost Per Action (CPA): Keep tabs on your acquisition costs.
- Return on Ad Spend (ROAS): Assess the profitability of your lead generation efforts.
For e-commerce campaigns, tracking metrics like Add-to-Cart Rate and Average Order Value (AOV) can provide insight into mid-funnel performance and lead quality. Akvile DeFazio, President of AKvertise, highlights:
"While Facebook's native lead forms typically generate leads at a lower CPA, website traffic campaigns directing users to landing page forms often yield higher-quality leads. These campaigns tend to get fewer leads and at a slightly higher cost, however, the lead quality is greater since these users are interested enough to leave Facebook to learn more"
Set Up Error Handling and Logs
A strong error-handling system is vital to prevent data loss and quickly resolve integration issues. Always check the "success" field in API responses to identify failures and use unique identifiers to track errors.
To make debugging easier, implement structured logging in JSON format. Include details like timestamps, user identifiers, and request parameters in each log entry.
For transient errors or rate-limiting issues, set up retry strategies with exponential backoff. Limit retries to 3–5 attempts, log each attempt, and use jitter mechanisms to randomize wait times between retries.
Monitor API usage through Facebook’s insights dashboard to track call volumes, response times, and error rates. Aim for an error rate below 1%, and set up alerts for response times exceeding 300 milliseconds.
Understanding Facebook’s HTTP status codes (like 400, 401, 403, 500, 502, and 503) is also essential. Review JSON error objects for details such as "message", "type", and "code" to debug issues effectively.
Finally, test your error-handling system regularly using mock services, intentional delays, unit tests, or automated testing frameworks. This ensures your integration can handle unexpected scenarios without breaking.
Conclusion
Ensure every step of your Facebook Lead Ads API setup is handled carefully. This includes setting up a Developer Account, securing access tokens, configuring webhooks, and thoroughly testing the integration.
Speed matters when it comes to lead processing. Quick follow-ups not only improve lead qualification but also align with consumer expectations.
By following these steps, your API integration can become a powerful tool for generating leads.
Tools like Reform add even more value with features such as multi-step forms, conditional routing, and lead enrichment. These capabilities enhance conversions and, when combined with Reform's seamless CRM integrations, create an efficient lead management system that captures higher-quality prospects.
To get even better results, regularly perform A/B testing on your lead forms. Keep an eye on Facebook's updates to utilize features like Flexible Form Delivery and multi-select questions effectively.
With proper setup, consistent testing, and ongoing optimization, your Facebook Lead Ads API integration can drive steady, high-quality lead generation, contributing to meaningful business growth. By following these steps methodically, you can ensure a smooth and high-performing integration.
FAQs
What are the most common issues during Facebook Lead Ads API setup, and how can I fix them?
Setting up the Facebook Lead Ads API can come with its fair share of hiccups, such as permission errors, webhook misconfigurations, and data retrieval issues. Here’s how you can tackle these problems:
- Double-check that your app has the necessary permissions, including ads_management, leads_retrieval, and pages_manage_ads. Missing permissions are a common cause of errors.
- Use Facebook's built-in testing tools to verify your webhook connections. These tools can help pinpoint and resolve any connection issues.
- Regularly audit your API settings and test integrations to catch and fix problems before they escalate.
By ensuring your permissions are in order, thoroughly testing your setup, and staying proactive with troubleshooting, you’ll set yourself up for a smoother integration process.
How can businesses stay compliant with privacy laws like GDPR and CCPA when using Facebook Lead Ads?
When using Facebook Lead Ads, staying aligned with privacy laws like GDPR and CCPA is non-negotiable. Start by ensuring your privacy policy is crystal clear, regularly updated, and easy to find. It should outline how you collect, use, and store data, leaving no room for ambiguity.
Another key step is obtaining explicit consent from users. Clearly explain how their information will be used and include a direct link to your privacy policy within the lead form. Not only does this keep you on the right side of the law, but it also strengthens trust with your audience - a win-win for everyone.
What are the best practices for securely handling access tokens when integrating with the Facebook Lead Ads API?
To keep access tokens safe while working with Facebook Lead Ads API, here are some key practices to follow:
- Encrypt tokens both when stored and during transmission to block unauthorized access.
- Never include tokens in URLs, logs, or public repositories where they could be exposed.
- Store tokens in a secure location, like environment variables or a dedicated secure vault.
It's also a good idea to refresh tokens regularly to minimize the chance of misuse. Limit their scope and permissions so they only enable the actions you truly need. These measures go a long way in safeguarding sensitive information and ensuring your integration stays secure.
Related Blog Posts
Get new content delivered straight to your inbox

The Response
Updates on the Reform platform, insights on optimizing conversion rates, and tips to craft forms that convert.


Drive real results with form optimizations
Tested across hundreds of experiments, our strategies deliver a 215% lift in qualified leads for B2B and SaaS companies.
