
.webp)
Fix Common OAuth Errors in Form Integrations


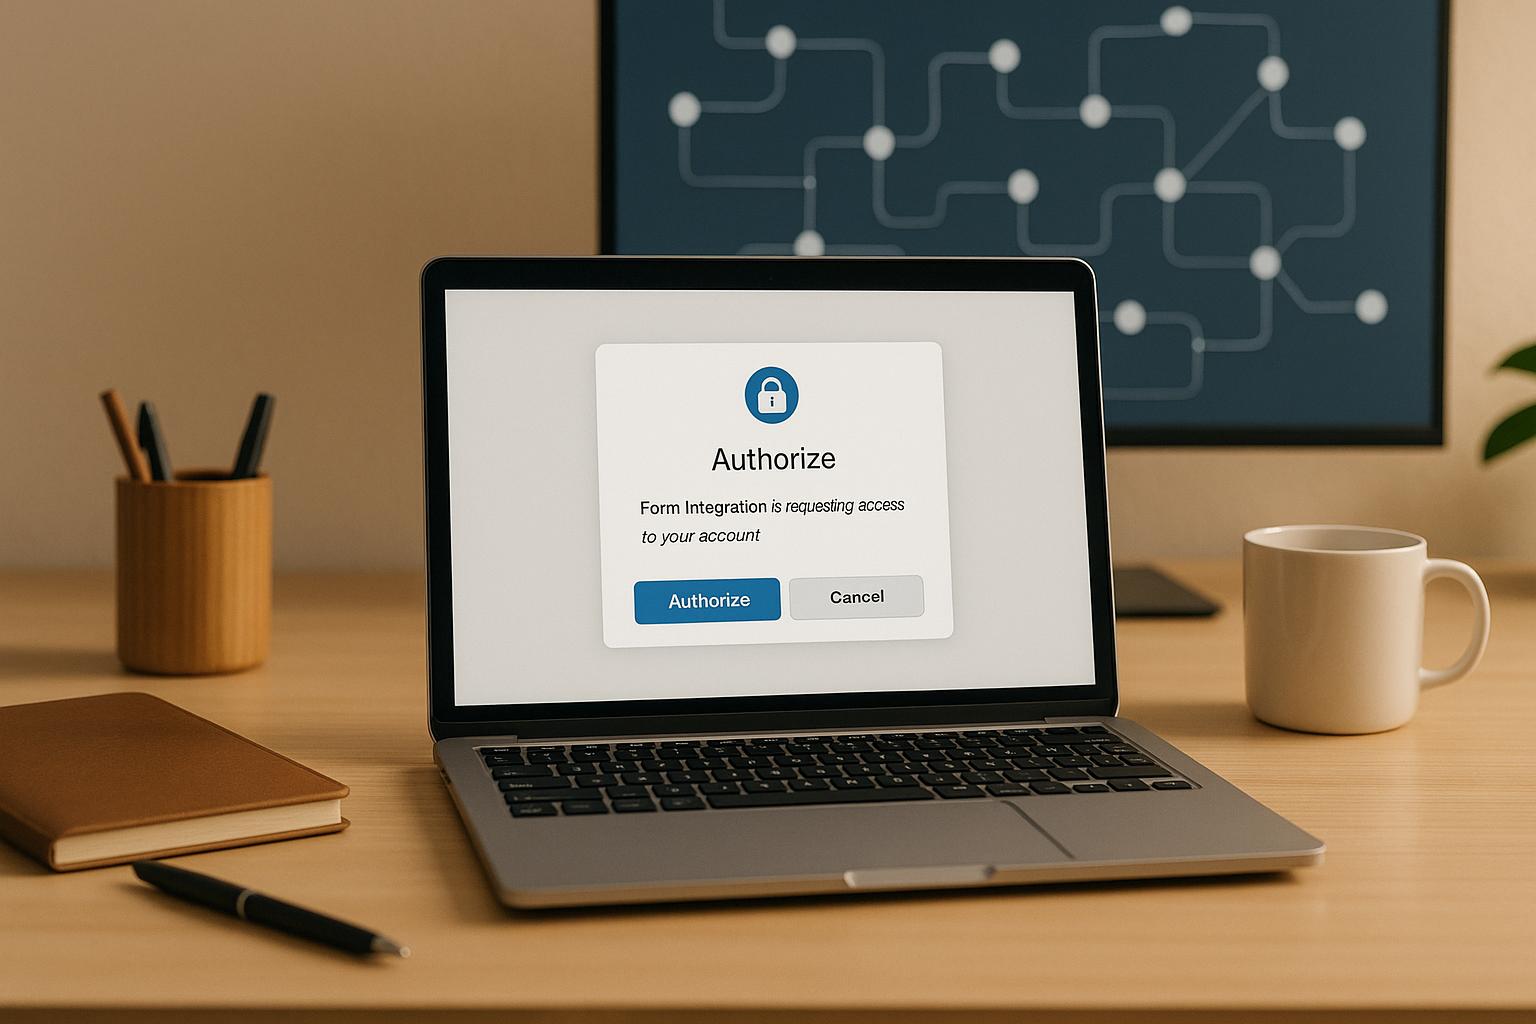
OAuth errors can disrupt your form integrations, but most issues are simple to fix. Common problems include invalid credentials, expired tokens, redirect URI mismatches, and scope errors. Here's what you need to know:
- Invalid Client Credentials: Double-check your Client ID and Secret in the OAuth provider's settings.
- Expired Tokens: Automate token refreshes to avoid disruptions.
- Redirect URI Mismatches: Ensure the URI matches exactly with what's registered.
- Scope Errors: Request only the permissions your app needs, and verify scope names.
To prevent these errors:
- Store credentials securely using tools like AWS Secrets Manager.
- Test your OAuth setup in a staging environment.
- Monitor token expiration and authentication success rates.
Fixing OAuth issues is about attention to detail - small errors like typos or mismatches can cause failures. Keep configurations accurate, automate token handling, and maintain clear documentation for smooth operations.
#CommunityCorner e7: Top 8 OAuth 2.0 Errors and how to crush them!
Common OAuth Errors and Their Causes
Integrating OAuth into your forms can sometimes run into hiccups, especially when connecting to tools like CRMs or marketing platforms. These hiccups often manifest as specific error types, each tied to a particular cause. Here’s a breakdown of the most common OAuth errors and what might be causing them.
Invalid Client Credentials
The Client ID and Client Secret are the backbone of OAuth authentication. The Client ID serves as your app’s public identifier, while the Client Secret acts as a private key to confirm your app’s identity. If these credentials are incorrect, outdated, or misconfigured, the OAuth provider will reject the connection, often with error messages like "invalid_client_id" or "Invalid client credentials."
Several common mistakes can trigger this error:
- Using the wrong Client Secret (e.g., entering the Client Secret ID instead of the actual secret value).
- Failing to update credentials after they’ve been regenerated or rotated by the OAuth provider.
- Copy-paste errors, such as extra spaces or missing characters.
To fix this, log into your OAuth provider’s developer console and double-check that the credentials in your integration settings match the active ones. Always ensure you’re using the latest, correct values.
Expired or Invalid Access Tokens
Access tokens are short-lived credentials that allow your form to access specific resources on behalf of a user. These tokens are designed to expire after a set period (ranging from hours to days) to minimize security risks. Most OAuth providers also issue refresh tokens, which let your integration request new access tokens automatically.
When an access token expires, your form connection loses access to the linked tool, causing issues like:
- Form submissions failing to sync with your CRM.
- Users encountering authentication errors during form submissions.
If your setup doesn’t include an automatic refresh mechanism, you’ll need to manually reauthenticate when tokens expire - a tedious and impractical solution. Tokens can also become invalid if they’re revoked by the user, if the OAuth app is disabled, or if they were issued in a test environment.
To avoid these disruptions, monitor token expiration periods and implement an automated refresh process. This ensures smooth integration and uninterrupted workflows.
Scope Mismatch and Permission Errors
OAuth scopes define what your app can access or do with a user’s data. For example, a scope might grant permission to read contact info, write lead data, or access email addresses. If the scopes requested by your app don’t match what the OAuth provider allows - or if they don’t align with your app’s actual needs - you’ll encounter errors like "invalid_scope."
Common causes of scope mismatches include:
- Typos in scope names (e.g., requesting "readd" instead of "read").
- Requesting scopes that haven’t been enabled in your OAuth app’s settings.
- Asking for permissions the provider doesn’t support.
To resolve this, review the OAuth provider’s documentation for the exact scope names your app needs. For example, creating leads in a CRM might require "contacts.write", while syncing email data might need "mail.read." Make sure these scopes are enabled in your app settings and update your integration to request only the necessary permissions.
| Error Type | Typical Error Message | Primary Cause |
|---|---|---|
| Invalid Client Credentials | "invalid_client_id" or "Invalid client credentials" | Misconfigured credentials |
| Expired Access Token | Authentication failure or "invalid_grant" | Token expired without an active refresh mechanism |
| Scope Mismatch | "invalid_scope" | Typos or requesting unauthorized permissions |
How to Fix OAuth Configuration Issues
OAuth configuration errors can often be traced back to mismatched settings, incorrect URLs, or validation problems. Here’s how you can identify and resolve common issues effectively.
Redirect URI Mismatches
One common issue is a redirect URI mismatch, which happens when the URI in your integration doesn’t match the one registered with your OAuth provider. Even small differences, like an extra slash or a different protocol, can cause the authentication process to fail.
OAuth providers enforce strict validation to ensure the redirect URI in your authentication request matches exactly with what’s registered. This is a security measure to prevent unauthorized access. For example, if the registered URI is https://example.com/callback, but your integration uses https://example.com/oauth/callback, the connection will fail.
To resolve this:
- Log into your OAuth provider’s developer console (e.g., Google Cloud Console, Microsoft Azure, or your marketing tool’s OAuth settings).
- Locate the registered redirect URI and ensure it matches your integration’s configuration exactly.
- Common errors include protocol mismatches (HTTP vs. HTTPS), trailing slashes, or incorrect subdomains.
You can either update your integration to match the registered URI or adjust the URI in the provider’s settings. After making changes, clear your cache and test the OAuth flow to confirm the issue is resolved.
Authorization Server and Endpoint Errors
Misconfigured or unreachable endpoints are a frequent cause of OAuth failures. Your integration relies on specific URLs provided by the OAuth service:
- Authorization endpoint: Where users grant permissions.
- Token endpoint: Where authorization codes are exchanged for access tokens.
- JWKS endpoint: Used for validating tokens.
Endpoint errors often stem from typos, outdated URLs, or network restrictions. To address this:
- Refer to your OAuth provider’s documentation to verify the correct URLs for these endpoints.
- Make sure the URLs in your integration match exactly, as even small differences can cause issues.
- Test connectivity using tools like
curlor Postman to confirm the endpoints are accessible and respond as expected. - Check that the endpoints have valid SSL/TLS certificates.
If endpoints are unreachable, review your organization’s firewall rules to ensure outbound HTTPS connections to the OAuth provider’s domain are allowed. Some corporate networks block external services, which can disrupt the OAuth flow.
| Configuration Element | What to Verify | Common Problems |
|---|---|---|
| Authorization Endpoint | Matches provider documentation exactly | Typos, outdated URLs, wrong domain |
| Token Endpoint | Accessible via HTTPS, valid responses | Network blocks, SSL issues |
| JWKS Endpoint | Returns valid JSON with public keys | Wrong path, moved or deprecated URLs |
Token Signature and Issuer Validation Failures
JWT signature validation issues occur when your application cannot verify the token against the provider’s public keys. OAuth providers sign tokens with private keys, and your app must use the public keys (available at the JWKS endpoint) to validate them.
Common causes of validation failures include:
- Incorrect or unreachable JWKS endpoint configurations.
- Tokens signed with keys not listed in the JWKS.
- Mismatched "iss" (issuer) claims in the token.
For example, if your integration uses https://provider.com/.well-known/jwks.json but the correct endpoint is https://provider.com/oauth/.well-known/jwks.json, validation will fail.
To fix this:
- Fetch the correct issuer URL from the provider’s metadata endpoint (e.g.,
/.well-known/openid-configuration). - Update your integration’s issuer and JWKS endpoint settings to match the documentation exactly.
- Test the JWKS endpoint by making an HTTP GET request and confirm it returns valid JSON with public keys.
- Ensure the token’s "kid" (key ID) matches one of the keys in the JWKS response.
For Azure OAuth, verify that the correct scopes are configured, as incorrect scopes can also cause validation errors. If you’re using Keycloak or a custom OAuth provider, double-check the client secret, as misconfigured secrets can prevent proper token validation.
After updating your settings, test the entire OAuth flow to confirm tokens are being validated successfully.
Best Practices for OAuth Configuration
Taking a systematic approach can help prevent future issues. Here are some tips:
- Create a checklist covering all key OAuth components: client credentials, redirect URI, scopes, authorization endpoint, token endpoint, JWKS endpoint, issuer URL, and SSL/TLS certificates.
- Use secure storage solutions like AWS Secrets Manager to manage sensitive information, reducing manual errors.
- Enable error logging and monitoring to capture OAuth-related issues in real-time, so you can address them quickly.
sbb-itb-5f36581
How to Prevent OAuth Errors
Avoiding OAuth errors is all about staying ahead of potential issues with a well-organized approach. By putting structured processes and monitoring systems in place, you can sidestep most authentication failures before they cause problems with your form integrations.
Credential and Token Management
Keeping your credentials secure and up to date is key to a smooth OAuth implementation. Rotate client secrets and API keys regularly - every 90 days is a good rule of thumb. When rotating credentials, make sure both the old and new credentials work during the transition to avoid service disruptions.
Use secure tools like AWS Secrets Manager or HashiCorp Vault to store sensitive credentials. These tools help automate the credential lifecycle and cut down on manual errors. For form integrations, work with your marketing tool provider to coordinate credential rotation schedules, and document each change with timestamps and details about who was responsible. This creates a solid audit trail.
Tokens need attention, too. Automate token refreshes before they expire by using refresh tokens. Ideally, set up your system to refresh tokens when they’re 80–90% through their lifespan. Use monitoring tools to track expiration times and trigger the refresh process automatically. Platforms like Reform make it easier to handle token refreshes seamlessly. Also, log any failed refresh attempts and set up alerts for tokens nearing expiration to prevent last-minute scrambles.
Once your credentials and tokens are under control, focus on ensuring your scope settings and endpoints are configured correctly.
Scope Auditing and Endpoint Validation
Scope mismatches are a common cause of OAuth errors. Start by documenting all the scopes your marketing tool needs - like permissions for reading or updating contact lists, leads, or subscriber data. You can usually find this information in the tool’s OAuth integration documentation or API reference.
When setting up your integration, make sure the requested scopes align with what’s allowed by the OAuth provider and what’s needed for your integration. Stick to the principle of least privilege - don’t ask for more access than necessary. For Azure OAuth setups, double-check that your scopes are configured correctly, as errors here can lead to issues like JWT signature validation failures. Regularly review your documented scopes during security audits or whenever you update your integrations.
Endpoint validation is just as important. Confirm that URLs for authorization servers, token endpoints, and user info endpoints are accurate and accessible. Check DNS settings and ensure firewalls, proxies, or SSL/TLS certificates aren’t blocking requests to the OAuth provider. It’s a good idea to create a staging environment that mirrors production to test all OAuth flows - like initial authorization, token refreshes, and error scenarios. Load testing can also help ensure that your OAuth setup can handle a high volume of form submissions without becoming a bottleneck.
After securing your scopes and endpoints, keep everything well-documented for future reference.
Maintaining Accurate Documentation
Good documentation can save you a lot of headaches. Create a centralized repository with all the OAuth configuration details for each integrated marketing tool. Include client IDs, redirect URIs, required scopes, and endpoint URLs. Add setup instructions, a log of past issues and their fixes, credential rotation schedules, and details about token refresh mechanisms.
Use version control to track changes in documentation and include visual aids where necessary. Share this repository with everyone involved in managing form integrations, and update it whenever configurations change or new issues arise.
If you manage multiple OAuth integrations, consider using a centralized authentication manager, such as an API gateway or middleware layer. This can simplify credential rotation, error handling, and token management while enforcing role-based access controls. Regularly audit this system to ensure all integrations use valid credentials and to remove any unused or outdated entries.
Finally, keep a close eye on your OAuth processes with real-time monitoring. Track the success and failure rates of authentication attempts, and set alerts if failure rates exceed acceptable limits - say, more than 5% of attempts failing. Log all OAuth requests and responses for analysis, and use synthetic monitoring to periodically test OAuth flows in production. Pay attention to error codes like invalid_client, invalid_grant, or redirect_uri_mismatch, and monitor response times to catch potential network issues early. Dashboards that display OAuth health metrics can help your team quickly identify and address any trends or problems.
For organizations using Reform's no-code form builder, its built-in centralized authentication management features can further simplify and secure your OAuth integrations.
Conclusion
OAuth errors in form integrations can throw a wrench into your lead capture and conversion efforts, often due to preventable misconfigurations. Common culprits include invalid credentials, mismatched redirect URIs, or expired tokens. Thankfully, these issues are usually straightforward to address once you pinpoint the problem.
To ensure your OAuth integrations run smoothly, focus on careful setup and proactive management. Double-check that your redirect URIs match exactly with those registered at your OAuth provider - even the smallest typo can lead to failure. Automating token refresh processes is another key step, ensuring access tokens renew seamlessly and avoid mid-submission errors.
Keeping detailed records of your OAuth configurations can save time when troubleshooting. Include critical details like client IDs, redirect URIs, required scopes, and endpoint URLs. Pair this with real-time monitoring to track authentication success rates and identify unusual error patterns early. Comprehensive documentation also plays a crucial role in preventing repeated mistakes.
Before going live, test your configurations in a staging environment that mirrors production. Simulate error scenarios to confirm your application handles failures gracefully and ensure network settings allow requests to reach your OAuth provider. The payoff? Fewer authentication failures and a smoother user experience.
For teams managing multiple form integrations, centralized authentication management can simplify the process. By consolidating credential rotation, error handling, and token lifecycle management, you can streamline operations across all your marketing tools. Reform’s no-code form builder offers features designed to make OAuth integration management easier and more efficient.
FAQs
How can I manage and update OAuth credentials to avoid invalid client credential errors?
To avoid errors related to invalid client credentials, it's crucial to keep your OAuth credentials safe and up to date. Use tools like a secure password manager or environment variables to handle sensitive information properly. Make it a habit to rotate your credentials periodically, especially if there's any chance they've been exposed or compromised.
When you update your credentials, double-check that all connected tools and services are using the most recent version. This ensures smooth operations and minimizes the risk of authentication issues. Sticking to best practices for managing credentials is key to safeguarding your data and maintaining reliable integrations.
How can I ensure my redirect URI matches the registered URI to avoid errors?
When setting up OAuth, ensuring your redirect URI matches the registered URI exactly is critical to avoid mismatches. Pay close attention to every detail, including the protocol (like https://), domain, path, and any query parameters. Even minor differences - like an extra trailing slash or variations in capitalization - can lead to errors.
Take a moment to review the registered URI in your app's settings on the marketing tool's platform. Compare it carefully with the URI you’ve entered in your form integration. For those using Reform, make sure the redirect URI in your integration settings matches precisely with the one registered in your OAuth configuration. Precision here is key.
How can I set up an automated token refresh to avoid issues with expired tokens?
To avoid interruptions caused by expired tokens, setting up an automated token refresh process is a smart move. This way, your OAuth integration keeps running smoothly without requiring constant manual updates.
Many APIs provide a refresh token along with the access token. The refresh token allows you to request a new access token before the current one runs out. Here's how you can automate the process:
- Securely store tokens: Keep both the access token and refresh token in a safe location.
- Track expiration times: Use the expiration time included in the API response to monitor when the access token will expire.
- Request a new token before expiration: Use the refresh token to obtain a new access token from the API's token endpoint before the current one expires.
- Update stored tokens: Replace the old tokens with the new ones to ensure your system always has valid credentials.
By automating these steps, you can ensure your workflows continue uninterrupted and your integration remains reliable.
Related Blog Posts
Get new content delivered straight to your inbox

The Response
Updates on the Reform platform, insights on optimizing conversion rates, and tips to craft forms that convert.


Drive real results with form optimizations
Tested across hundreds of experiments, our strategies deliver a 215% lift in qualified leads for B2B and SaaS companies.
