
.webp)
Checklist for Cross-Browser Accessibility Testing


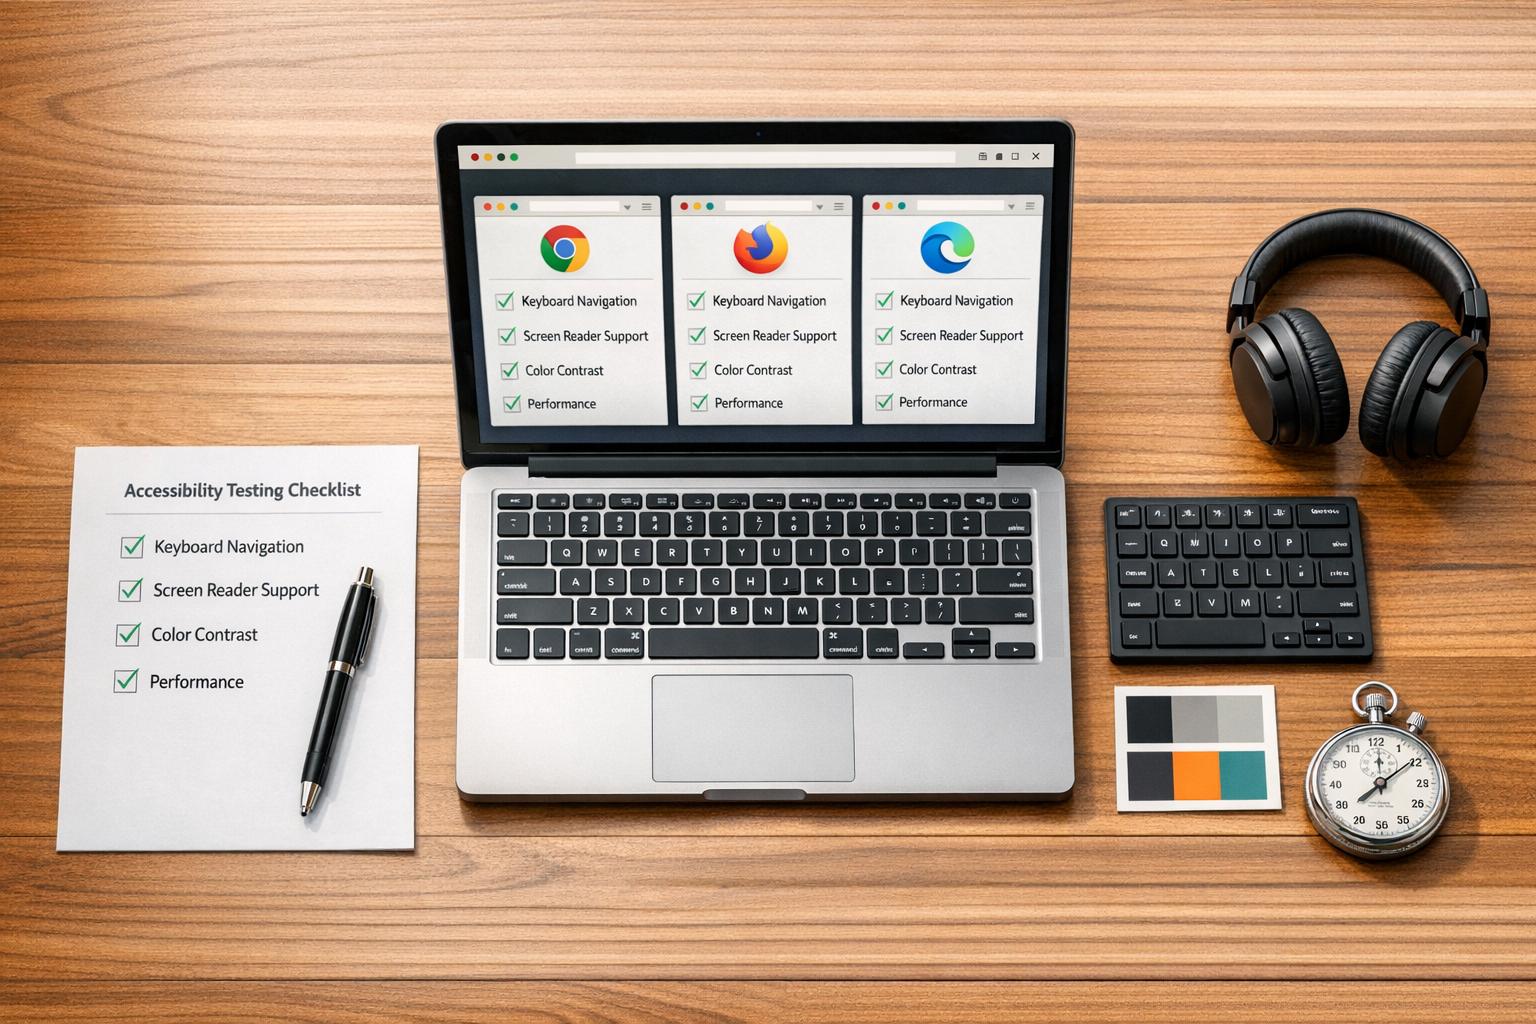
Accessibility isn’t one-size-fits-all. Different browsers interpret code in unique ways, which can impact how users - especially those relying on assistive technologies - experience your site. This guide simplifies cross-browser accessibility testing into actionable steps to ensure your website works for everyone, no matter their browser or device.
Key Takeaways:
- Why it matters: Accessibility issues vary across browsers like Chrome, Safari, Edge, and Firefox due to differences in rendering engines and assistive technology support.
- Preparation steps: Identify target browsers based on user analytics, validate HTML/CSS, and choose the right testing tools (e.g., WAVE, Axe, Lighthouse).
- Visual checks: Ensure consistent design, proper font rendering, and WCAG-compliant color contrast across browsers.
- Functional tests: Focus on keyboard navigation, screen reader compatibility, and dynamic content behavior.
- Compliance: Meet WCAG 2.1 Level AA standards to avoid excluding users and reduce legal risks.
- Tools to use: Combine automated tools with manual testing on real devices for best results.
Accessibility testing isn’t optional - it’s essential for usability, legal compliance, and creating a better web experience for everyone.

Cross-Browser Accessibility Testing Workflow: 4-Phase Checklist
Cross-Browser Consistency: Mitigating Testing Discrepancies with Cypress | Miloš Jovanović
sbb-itb-5f36581
Preparation Steps for Cross-Browser Accessibility Testing
Laying a solid foundation is crucial before diving into functional and compliance checks for accessibility testing. Here's how to get started:
Select Target Browsers and Devices
Start by analyzing your website's analytics to pinpoint the browsers and devices your audience uses most. Tools like Google Analytics or Mixpanel can help you identify browser-OS combinations that account for at least 5% of your traffic or revenue. Globally, Chrome leads the market with about 65%, followed by Safari at 19%, Edge at 5%, and Firefox at 3%. Keep in mind that B2B websites often see about 54–55% desktop usage, with Microsoft Edge being a popular choice in corporate environments.
To streamline testing, organize browsers into tiers based on their market share and importance to your business. For example, Tier 1 should cover 85–90% of your user base. Focus on the current and previous major versions of leading browsers, like Chrome 124/123 on Windows 11 and macOS, and Safari 18/17 on macOS and iOS. Don’t forget to include Mobile Safari, which dominates around 50% of mobile traffic in the U.S.. Testing across the three main rendering engines - Blink (used by Chrome and Edge), WebKit (used by Safari), and Gecko (used by Firefox) - is key since each processes code differently.
Once you've identified your target browsers, ensure your code is clean and consistent to avoid rendering issues.
Validate HTML and CSS Code
Before running accessibility-specific tests, use W3C validators to check your HTML and CSS for syntax errors. Mistakes like unclosed tags or missing DOCTYPE declarations can activate quirks mode, which disrupts proper rendering and affects assistive technologies. Validation also ensures you're using semantic HTML elements, such as <main> and <nav>, which are critical for creating an accurate accessibility tree that screen readers rely on.
"Validate the CSS, HTML and XHTML. Always ensure that all definitions abide by relevant standards and that you haven't left any open tags." - BrowserStack
Make sure to include <!DOCTYPE html> and <html lang="en"> at the start of your documents. These elements help browsers and screen readers interpret your content correctly. Additionally, check that your SSL certificates are compatible with all targeted browser versions, as security warnings can block access for users depending on assistive configurations.
Once your code passes validation, it’s time to pick tools that will enhance your accessibility testing process.
Choose Accessibility Testing Tools
A combination of automated and manual testing tools is essential for thorough accessibility evaluations. Automated tools like WAVE, Axe, and Google Lighthouse are great for quickly spotting WCAG violations and missing ARIA attributes, but they typically catch only 30–40% of issues. To go deeper, use screen readers like NVDA (free for Windows), VoiceOver (built into macOS/iOS), or JAWS (a paid option for Windows) to see how assistive technologies interpret your content.
For seamless integration into your workflow, look for tools that work with CI/CD pipelines (like Jenkins or GitHub) and project management platforms like Jira. Real device testing is also critical, as emulators often miss hardware-specific bugs. Services like BrowserStack ($39–$199/month), LambdaTest ($15–$99/month), and Sauce Labs ($149–$299/month) provide access to real devices. If you're working with a tight budget, Microsoft’s Accessibility Insights is entirely free. By combining multiple tools instead of relying on just one, you’ll gain a more detailed understanding of potential accessibility issues.
Visual and Layout Consistency Checks
Ensuring that your website looks and functions well across different browsers is essential for maintaining accessibility and usability.
Check Design Element Consistency
To keep design elements uniform, start with a CSS reset like Eric Meyer’s or Normalize.css. This helps standardize margins, paddings, and font sizes. Use relative units like em or rem for typography, with a base font size of 16px in your HTML selector. This provides a consistent reference point for scaling text.
Font rendering can vary between browsers due to differences in their engines. To address this, include -webkit-font-smoothing: antialiased and -moz-osx-font-smoothing: grayscale in your CSS, particularly for macOS and iOS users. For font formats, prioritize WOFF2, which is supported by over 97% of modern browsers, and keep WOFF as a fallback. Additionally, use font-display: swap in your @font-face declarations to prevent the "Flash of Invisible Text" and ensure content stays readable while fonts load.
Interactive elements like buttons and links should be at least 44×44 pixels to accommodate users with motor impairments. Use a unitless line-height (e.g., 1.5) for consistent vertical spacing across browsers. Also, verify that all text adheres to the WCAG standard for color contrast - 4.5:1 for regular text and 3:1 for larger text (18pt+ or 14pt bold). Tools like the WebAIM Contrast Checker can help you confirm these ratios across different browsers.
Finally, ensure these visual styles remain consistent on various screen sizes and zoom levels.
Test Responsive Design and Zoom Functionality
Once your design is consistent, test its responsiveness by enlarging text to 200%. Content must remain functional at this size, as required by WCAG 1.4.4. Firefox is particularly useful for this, thanks to its "Zoom Text Only" feature, which isolates text scaling issues (unlike other browsers that zoom entire pages by default). Resize your browser to identify any breakpoints where content overlaps or becomes truncated before reaching the 200% zoom threshold.
Check your viewport meta tag to ensure it doesn’t disable user scaling - avoid user-scalable=no in your code. At 320 CSS pixels wide, your content should not require both vertical and horizontal scrolling, per WCAG 1.4.10. Test how your site adapts to orientation changes on mobile devices, ensuring seamless transitions between portrait and landscape modes. When testing on mobile, confirm that virtual keyboards don’t obscure input fields or action buttons.
"Remember that you are not your users - just because your site works on your MacBook Pro or high-end Galaxy Nexus, doesn't mean it will work for all your users!" - MDN Web Docs
For forms, ensure multi-step forms and conditional fields stay functional at different zoom levels. If you rely on tools like Reform for conversion-focused forms, this is crucial for maintaining accessibility and improving completion rates.
These steps help ensure your site’s appearance and usability remain consistent across browsers and devices.
Verify Image Accessibility
As part of your layout checks, confirm that images effectively communicate their purpose across browsers. Provide meaningful alt text for informative images, avoiding redundant phrases like "image of" or "graphic of", as screen readers already specify the element’s role. For decorative images, use null alt text (alt="") or role="presentation" so assistive technologies skip them. For complex visuals like charts, include a brief alt text summary and link to a detailed description or data table.
"The golden rule is: write what you'd say to someone who can't see the image." - DEV Community
For SVG graphics, add role="img" and include either a <title> element or an aria-label to ensure accessibility. If using background images to convey information, make them accessible with an aria-label or visible text, as automated tools often overlook these. Disable CSS in your browser using tools like the Web Developer Toolbar to confirm your HTML structure and image placement make sense without styling.
Images should remain clear and high-resolution at 400% zoom on a 1,280px viewport. At this level, ensure there’s no information loss or horizontal scrolling - except for essential content like maps or large tables. For clickable images or buttons, ensure pointer targets are at least 24×24 pixels to assist users with mobility impairments.
Functionality and Interaction Testing
Once you've ensured your site looks consistent, the next step is to test how users interact with your content.
Test Keyboard Navigation and Form Controls
Start by navigating your site using only a keyboard. Press Tab to move forward through interactive elements and Shift + Tab to move backward. The focus should follow a logical path - usually top-to-bottom and left-to-right - mirroring how users visually scan a page.
"Keyboard accessibility is one of the most important aspects of web accessibility. Many users with motor disabilities rely on a keyboard." - WebAIM
Every interactive element must have a visible focus indicator, such as an outline or highlight, to show where the user is on the page. This indicator should meet a minimum contrast ratio of 3:1 against the background. If you remove the default outline, replace it with an alternative that's just as visible.
WebAIM's 2024 analysis reported that 45.9% of homepages lacked proper form labels, and about 25% of digital accessibility issues were tied to insufficient keyboard support.
Here are some key keyboard interactions to test:
- Buttons should respond to both
EnterandSpacebar. - Links should activate with
Enter. - Form inputs must have a
<label>element using theforattribute that matches the input'sid. Visual proximity alone isn't enough for screen readers. - Group related controls like radio buttons or checkboxes using
<fieldset>and<legend>so screen readers can provide context for the group.
| Interaction | Keystrokes | Expected Behavior |
|---|---|---|
| Navigate forward | Tab |
Moves focus to the next interactive element |
| Navigate backward | Shift + Tab |
Moves focus to the previous element |
| Activate button | Enter or Spacebar |
Triggers the button action |
| Activate link | Enter |
Follows the link |
| Toggle checkbox | Spacebar |
Checks or unchecks the box |
| Navigate radio buttons | Arrow Keys |
Moves between options in the group |
| Close modal | Esc |
Dismisses overlay and returns focus |
When testing forms - whether simple or multi-step - link error messages to fields using aria-describedby and implement role="alert" or aria-live="assertive" for screen reader announcements. If a submission fails, move focus to an error summary or the first field with an issue. On mobile, ensure tap targets are at least 48×48 pixels and that the appropriate virtual keyboard (e.g., numeric for type="tel") appears. Always test on real devices, as emulators might miss nuances like specific keyboard behaviors or touch gestures.
Once static interactions are verified, move on to dynamic elements that require more complex focus management.
Test JavaScript and Dynamic Content
After testing keyboard navigation, check how dynamic content handles focus. For example, when a modal opens, focus should shift to the first interactive element inside it and stay there until the modal is closed with the Esc key. Once closed, focus should return to the triggering element.
"Silence is bad. When screen reader users activate a feature (link, button, control, etc.), or when an important part of the content changes, they need to hear feedback." - Deque University
For dynamic updates - like search results, validation messages, or status notifications - use aria-live="polite" or aria-live="assertive" to announce changes without disrupting the user's focus. Reflect state changes (e.g., expanded/collapsed, selected/unselected) with ARIA attributes like aria-expanded or aria-selected.
Custom controls built with <div> or <span> need appropriate ARIA roles (e.g., role="button") and accessible names so screen readers can interpret their purpose. However, where possible, stick to native HTML elements like <button>, <input>, and <select> since they come with built-in accessibility features. Test these interactions across different browser and screen reader combinations, such as NVDA with Firefox or VoiceOver with Safari.
Disable CSS in your browser to ensure the DOM order remains logical. At 200% and 400% zoom levels, repeat your keyboard tests to catch any issues that might arise from responsive layouts.
Verify Navigation and Error Messages
Building on these guidelines, test navigation elements and error messages to ensure they function properly across browsers. For navigation, check that all links and menus are accessible and consistent. Skip links - usually the first focusable element on a page - should successfully move focus to the main content area. For search features, confirm that results load as expected and that filtering or sorting options are keyboard-accessible.
Error messages should be clear, specific, and directly associated with the relevant form fields. Use aria-invalid="true" to mark fields with errors and aria-required="true" for mandatory fields if the HTML5 required attribute isn't sufficient.
"In a world of Chrome, Safari, Firefox, and 47 Android devices, it 'works on my machine,' just doesn't cut it." - QA Brains
Check that sticky headers, cookie banners, or widgets like chat boxes don't obscure the currently focused element. Simply focusing on an element - like tabbing into a form field - should never trigger an unintended action, such as submitting a form or opening a new window.
WCAG Compliance and Assistive Technology Testing
Once you've ensured that your interactive elements work as intended, the next step is to confirm that your site aligns with accessibility standards and functions well with assistive tools that users depend on.
Run WCAG 2.1 Compliance Tests
WCAG 2.1 introduces 17 new success criteria that address accessibility for mobile devices, users with low vision, and cognitive challenges. These criteria are organized under the POUR principles (Perceivable, Operable, Understandable, and Robust). To achieve Level AA compliance, you’ll need to meet all WCAG 2.0 criteria plus 12 additional requirements.
"WCAG 2.1 AA is the most commonly required standard under accessibility laws such as the ADA, Section 508, and EN 301 549." – BrowserStack
Start with automated tools like axe DevTools, WAVE, or Lighthouse. These tools typically catch 30–40% of accessibility issues, leaving the rest for manual testing. Addressing common problems such as missing alt text, low contrast, absent form labels, empty links, and missing page language can resolve about 70% of detected issues.
Set your browser width to 1,280 pixels and zoom in to 400%. This ensures that no content is lost and horizontal scrolling is avoided, except for elements like maps or data tables (Reflow 1.4.10). Additionally, check that your site doesn’t force a specific screen orientation unless it’s necessary (Orientation 1.3.4). Use a contrast checker to confirm that UI elements, such as button borders and focus indicators, meet a minimum 3:1 contrast ratio (Non-text Contrast 1.4.11). Adjust line height to 1.5 times the font size and paragraph spacing to twice the font size to ensure no content becomes hidden (Text Spacing 1.4.12). These steps help maintain accessibility across all browsers, ensuring a consistent and inclusive experience.
Test with Screen Readers
While automated checks are helpful, screen reader testing is essential for uncovering usability issues that aren’t visible in the code. Popular screen readers include JAWS (40.5% market share), NVDA (37.7%), and VoiceOver for macOS and iOS (17.8%). Over 7 million Americans rely on screen readers to navigate websites. Test using common configurations like NVDA with Firefox or Chrome, JAWS with Chrome or Edge, and VoiceOver with Safari.
Use screen reader shortcuts - such as 'H' for headings, 'F' for forms, and 'B' for buttons - to ensure the page structure is intuitive. Screen readers operate in two modes: Browse mode, for navigating elements with arrow keys, and Forms mode, for interacting with form fields. Verify that both modes function as expected.
When testing forms, confirm that validation errors are announced by the screen reader and linked to the correct fields using aria-invalid="true". For dynamic updates, ensure that status messages use aria-live="polite" for non-urgent updates or aria-live="assertive" for critical alerts. Disable CSS to check that the reading order follows the DOM structure, as screen readers rely on this order regardless of visual layout. Lastly, test VoiceOver on iOS and TalkBack on Android to ensure accessibility on mobile devices.
Check Color Contrast and ARIA Implementation
After confirming compliance and screen reader functionality, focus on visual and semantic elements like color contrast and ARIA attributes. Ensure that focus indicators meet the required 3:1 contrast ratio. These checks complement prior tests by ensuring that visual and semantic cues remain effective across all devices and browsers.
Use native HTML elements whenever possible, and apply ARIA attributes only to enhance native semantics. The W3C emphasizes this approach:
"WAI-ARIA is intended to be used as a supplement for native language semantics, not a replacement. When the host language provides a feature that provides equivalent accessibility to the WAI-ARIA feature, use the host language feature." – W3C
Automated tools can help detect invalid ARIA attributes, missing labels, or duplicate IDs. Follow up with manual testing to confirm that ARIA states like aria-expanded, aria-checked, and aria-invalid update dynamically in the DOM during user interactions. Ensure that attributes like aria-labelledby and aria-describedby correctly reference their associated elements. For custom ARIA widgets - such as tabs, menus, or sliders - verify they follow standard keyboard interaction patterns, like using arrow keys for navigation and Esc to close. When testing modals, confirm that focus moves into the modal upon opening and remains trapped until the modal is dismissed.
Performance Testing and Issue Documentation
Ensuring strong performance and meticulous issue documentation goes beyond just functional and visual checks. These elements are critical for maintaining accessibility and providing a smooth user experience. Performance is directly tied to accessibility - slow-loading pages can disrupt screen readers or cause delays for keyboard users trying to interact with the site.
Test Page Load Performance
To evaluate how quickly users can interact with your page, focus on metrics like Time to Interactive (TTI) and Total Blocking Time (TBT). TTI measures when a page becomes fully responsive to keyboard input, while TBT highlights how long the main thread is blocked during the loading process. Both are crucial for users relying on screen readers or keyboard navigation.
For accurate results, always test on real devices instead of emulators. Real hardware can reveal processing and rendering behaviors that simulators might miss. Tools like Google Lighthouse, WebPageTest, and BrowserStack SpeedLab are great for testing. They allow you to simulate conditions like 3G or 4G networks or high latency, ensuring your site remains accessible to users on slower connections.
"In 2026, if testing is not done on real browsers, it is not testing, it is approximation." – BrowserStack Guide
Aim for a page load time of 0–2 seconds. While 3 seconds is tolerable, anything over 4 seconds is considered slow. Keep an eye on Largest Contentful Paint (LCP) to ensure main content loads quickly, and address render-blocking resources like large CSS or JavaScript files that might delay interactivity for screen reader users. To reduce load times, optimize images with formats like WebP, use lazy loading, and enable browser caching.
Once testing is complete, document your findings in detail to guide necessary improvements.
Document Issues and Solutions
After gathering performance data, log all identified issues systematically. Each entry should include:
- A clear description of the issue
- The URL and specific element affected
- The WCAG criterion violated
- A severity level: Critical, Serious, Moderate, or Minor
Also, document the expected behavior alongside what actually occurred. For instance: "Screen reader should announce 'Search' but only announces 'Button'" when testing on Chrome 122, macOS, with VoiceOver. Provide detailed reproduction steps so developers can replicate the issue in the same environment. Note whether the issue was detected by automated tools or during manual testing, as automated scanners typically catch only 30–40% of accessibility issues.
Assign each issue a WCAG criterion (e.g., 1.1.1 or 4.1.2) to serve as a resolution benchmark. A centralized dashboard can help track these issues and streamline the creation of Voluntary Product Accessibility Templates (VPAT).
Complete Final Review
Once fixes are implemented, run automated accessibility scans again to confirm that all WCAG violations have been resolved and no new issues have cropped up. For more complex problems - like keyboard traps, focus loss, or incorrect visual order - rely on real screen readers and physical devices rather than emulators.
Test complete user workflows, such as filling out and submitting forms, to ensure all fixes are functioning as intended. Use screenshot testing to catch any layout regressions caused by updates.
Finally, verify that all elements, such as buttons, pop-ups, and error messages, behave as expected across all target browsers. Regularly schedule accessibility scans during development cycles to maintain compliance and quickly address regressions.
Conclusion and Next Steps
Main Takeaways
This checklist highlights the essential steps for cross-browser accessibility testing. Ensuring accessibility across browsers, devices, and assistive technologies is an ongoing responsibility, both to meet legal standards and to create a better user experience. At its core are the POUR principles: content should be Perceivable (using alt text and captions), Operable (with keyboard navigation), Understandable (through clear language and consistent menus), and Robust (compatible with screen readers and assistive tools).
Aiming for Level AA compliance is a good starting point to meet ADA and Section 508 requirements. Testing on real devices is crucial to identify hardware-specific issues. Similarly, using actual screen readers like NVDA, JAWS, or VoiceOver ensures the accessibility tree provides accurate semantic information.
While automated tools are helpful, they only catch part of the picture. Manual testing is indispensable, and feedback from real users often reveals deeper issues, such as keyboard traps or confusing navigation paths.
These steps form the foundation, but long-term efforts are necessary to keep accessibility intact.
Maintain Accessibility Over Time
Accessibility isn't a one-time task - it’s an ongoing process, much like maintaining a public park. As content and technology evolve, regular attention is required. Incorporate automated scans into your CI/CD pipeline, schedule routine checks with every browser update, and address accessibility early in the design phase to avoid costly fixes later. Shockingly, about 70% of websites still fail to meet accessibility standards.
Consider appointing accessibility champions within your team to lead training and act as key resources. Staying up to date with evolving WCAG standards - such as the transition from version 2.1, which introduced 17 mobile-focused criteria, to 2.2, with 9 new cognitive and mobility standards, and eventually to 3.0 - ensures your site remains adaptable to new technologies like VR and AR.
For web forms in particular, tools like Reform focus on accessibility and usability, ensuring seamless functionality across browsers and assistive technologies. These platforms make lead capture and conversion more inclusive and effective.
FAQs
Which browser and device combinations should I test first?
To ensure broad compatibility, start with the most commonly used browsers and devices. For desktops, focus on Chrome, Safari, Firefox, and Edge. On mobile, test with Android and iOS devices that cover popular screen sizes and resolutions. This approach helps guarantee core functionality and visual consistency for the majority of users.
What issues do automated accessibility tools usually miss?
Automated accessibility tools are great for catching common problems like invalid HTML, missing alt text, or color contrast issues. But they have their limits. These tools often overlook challenges that need a human touch - things like cognitive accessibility barriers, how clear the content is, or whether interactive elements are easy to use. That’s why manual testing is so important. It fills in these gaps and helps create an experience that works for everyone.
Which screen reader and browser pairings should I prioritize?
When conducting accessibility testing, it's essential to focus on the most widely used screen reader and browser pairings. These include VoiceOver with Safari on iOS, TalkBack with Chrome on Android, JAWS with Chrome on desktop, and NVDA with Firefox on desktop. These combinations address a broad spectrum of user requirements across different devices and platforms, ensuring thorough and effective testing.
Related Blog Posts
Get new content delivered straight to your inbox

The Response
Updates on the Reform platform, insights on optimizing conversion rates, and tips to craft forms that convert.


Drive real results with form optimizations
Tested across hundreds of experiments, our strategies deliver a 215% lift in qualified leads for B2B and SaaS companies.
