
.webp)
How to collect first-party data with forms


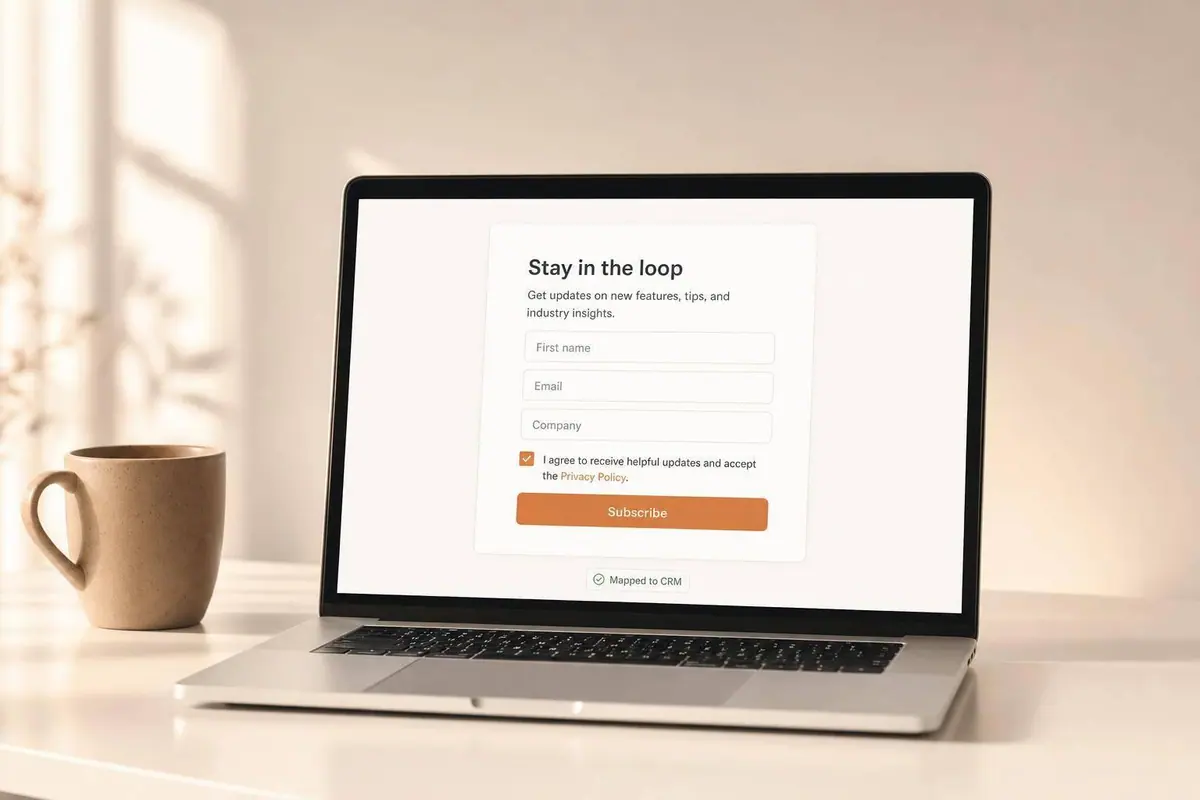
If you want better SaaS lead data in 2026, your forms need to do three things well: ask for less, get clear consent, and send clean data into your tools.
I’d sum up the article like this: use signup forms for account creation, demo forms for sales qualification, and newsletter forms for low-friction email opt-ins. Keep required fields short, put harder questions later, use progressive profiling to ask for more over time, and map every field to your CRM before launch.
A few numbers make the point fast:
- 87% of brands said first-party data is critical to growth
- 64% shifted budget away from third-party sources
- Cutting fields from 4 to 3 can lift conversions by nearly 50%
- Personalization based on direct user data can drive 40% more revenue
- Progressive profiling can lead to 42% higher lead-to-customer conversion
Here’s the simple takeaway for me:
- Signup forms: ask for the bare minimum
- Demo forms: ask only what sales will use
- Newsletter forms: start with email, maybe first name
- Consent: say what people are signing up for in plain English
- Data flow: connect each field to one CRM or email property
- Measurement: track views, starts, completions, and lead quality
| Form type | Main job | Best starting fields | What to ask later |
|---|---|---|---|
| Signup | Account setup | Work email, login method, name | Role or company if needed right away |
| Demo | Qualification and routing | Name, work email, company | Title, company size, use case, timeline, budget |
| Newsletter | Email opt-in | Email, first name optional | Role, industry, preferences |
The core idea is simple: forms are no longer just conversion points - they are direct data collection points. If I keep them short, clear, and connected to the right systems, I get better completion rates and cleaner customer data at the same time.
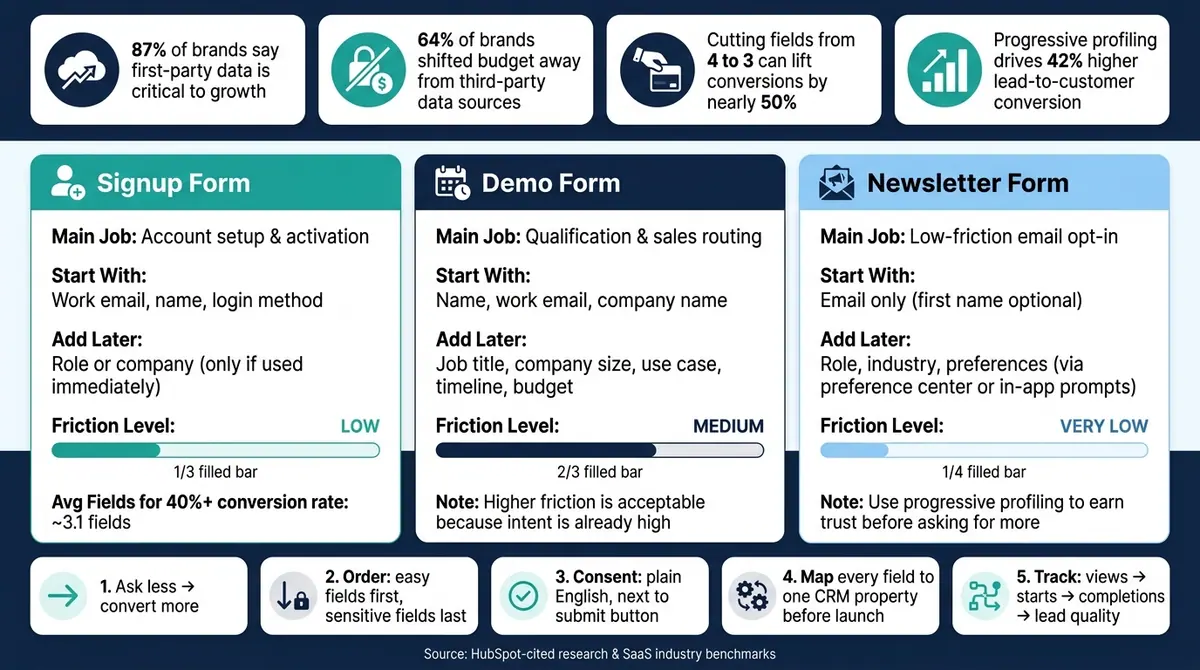
SaaS Form Types: What to Ask, When, and Why
How to Collect First Party Data from your Customers
sbb-itb-5f36581
Choose the right form type for the data you need
If a field won’t help with routing, qualification, personalization, or consent tracking, cut it.
Each form should serve one clear goal: activation, qualification, or nurture. From there, pick the form type based on the data you need to reach that goal.
Use signup forms for account setup and basic account data
Signup forms have one job: get the user into the product.
That’s why required fields should stay as close to the minimum as possible. In most cases, work email and the required login method are enough. You can add one business field, but only if the product needs it right away.
Fields like phone number or job title usually don’t belong here. They don’t change the user’s next step, and they can drive abandonment up fast. HubSpot-cited research found that reducing form fields from four to three increased conversions by nearly 50%. Signup forms with conversion rates above 40% often average about 3.1 fields.
Use demo forms for qualification, routing, and sales context
Demo forms can carry a bit more friction because the person filling one out is already taking your product seriously.
That gives you some room to ask for more. But don’t treat that as an excuse to pile on fields. Ask only for what sales will use to route the lead and shape the conversation. Fields like job title, company name, company size, use case, timeline, and budget make sense when they affect which rep gets the lead or how the demo is tailored.
The point is simple: give sales enough context to route the lead and tailor the demo. Extra fields hurt completion.
Use newsletter forms for simple email signup and progressive profiling
Newsletter forms should be the shortest forms on your site. Start with email only.
You can add first name if you plan to use it in your welcome sequence. Everything else - topics of interest, role, industry, and frequency preferences - should come later through a preference center, a follow-up email, or in-app prompts after the person has already opted in.
This is called progressive profiling. You earn trust first, then ask for more. Once you’ve chosen the right form type, the next move is to cut friction and keep the data clean.
| Form Type | Primary Goal | Start With | Add Later |
|---|---|---|---|
| Signup | Account setup & activation | Work email, name, login method | Role or company (only if used immediately) |
| Demo | Qualification & sales routing | Name, email, company name | Job title, company size, use case, timeline, budget |
| Newsletter | Low-friction opt-in | Email, first name (optional) | Role, industry |
Once the form type is set, tighten the fields and consent language before launch.
Design forms that get completed and return clean data
Once you’ve picked the right form type, the next job is execution. A form can look fine on the surface and still lose people fast. In practice, field choice, field order, and mobile usability often decide whether someone finishes or drops off. The goal is simple: cut friction and make sure the data flows into your systems cleanly.
Limit required fields and order questions from easy to sensitive
The rule here is blunt: only require a field if something breaks without it. If leaving it blank won’t affect routing, delivery, or compliance, remove it or mark it optional.
Field order matters just as much as field count. Start with easy, low-effort questions. Then move into contact details and qualification. Put higher-friction fields - like phone number, budget range, or purchase timeline - near the end. By then, the person has already put time into the form and is more likely to finish. Ask for a phone number too early, and you can lose the submission on the spot.
Be clear about optional inputs. You can label each one directly or add a note at the top: "All fields are required unless marked optional."
Use multi-step flows and conditional logic to keep forms relevant
Long forms tend to drag when everything sits on one page. Breaking them into a small number of focused steps makes the work feel lighter and keeps each screen easier to scan. A visible progress bar helps too. In most cases, 2–3 steps works well: basics first, qualification next, sensitive fields last.
Conditional logic helps trim the noise. Show people only the fields that fit their situation. If someone selects "Marketing leader", they probably don’t need to answer "Primary integration of interest", which may matter more to a developer. Irrelevant fields slow people down and add no gain.
Add validation, spam protection, and clear labels from the start
Validate data while people are filling out the form, not after they hit submit. Inline validation as the user types or tabs away lets them fix mistakes right away instead of getting blocked at the end. For email fields, check format in real time. For phone fields, allow common formats and normalize them on submission.
Spam protection should stay out of the way for normal users. Honeypot fields, timing checks, and rate limiting can catch bot traffic without making the form harder to use. Save stronger challenges for traffic that already looks suspicious. Reform includes built-in email validation and spam prevention, so these controls are there from the start.
Labels matter more than many teams think. Use plain wording - "Work email" instead of "Email address" - and place labels above fields, not inside them as placeholder text. Placeholder text disappears once someone starts typing, and that can lead to mistakes. On mobile, set the correct input types so the right keyboard appears on its own: an email keyboard for email fields, and a numeric keypad for phone and employee count fields. Small choices like these help keep CRM data cleaner.
Once submissions are clean, the next step is writing the consent copy and mapping each field into your CRM and email tools.
Write consent language and route form data into your systems
Tell users what you collect, why you collect it, and how to opt out
Once you've finished creating high-converting lead forms, complete the workflow with consent and data routing.
Keep consent copy short and place it next to the submit button. Tell people what you collect, why you collect it, and how they can opt out.
Skip vague wording like "for marketing purposes." Say what that means in plain English: newsletters, product tips, or event invitations. The FTC's guidance on disclosures stresses clarity, prominence, and proximity, so the copy should sit beside the action a user is taking, not hidden in a footer.
Keep marketing email consent, terms acceptance, and SMS consent separate. One checkbox for everything might seem easy, but it creates problems. If you collect phone numbers for text messages, add a separate SMS consent checkbox and spell out the message type, message and data rates, and the STOP opt-out.
Map each field to CRM and email properties before you launch
Before launch, create a field map that links each form field to one CRM or email property. Use the same naming across tools so sync issues don't creep in and consent status stays in line. This also helps you catch small mismatches early, like a form field called "Company" that doesn't match "Company Name" in your CRM.
| Form Field | CRM/Email Property | Purpose |
|---|---|---|
| Email Address (primary key) | Deduplication and contact lookup | |
| Company size | Company Size (picklist) | Lead routing and territory assignment |
| Use case | Product Interest (dropdown) | Sales alerts and nurture sequence selection |
| UTM parameters | Lead Source / Campaign | Attribution and ROI reporting |
| Marketing consent | Email Marketing Consent (boolean) | Segmentation and send eligibility |
| SMS consent | SMS Opt-In (boolean) | Text message eligibility |
Automate routing, segmentation, and follow-up from form inputs
Once the field map is in place, decide what each submission should trigger. A demo request from a larger company shouldn't go down the same path as one from a smaller team. High-intent submissions should create or update a CRM record, alert the right rep, and kick off the right follow-up sequence.
Reform's CRM and marketing integrations, conditional routing, and record enrichment with firmographic data can run this flow directly. Submissions can move into different pipelines based on company size or use case, pull in extra details from the email domain or website, and sync into connected tools like HubSpot or Salesforce. For newsletter and signup forms, the setup is simpler: check consent status, add the contact to the right segment, and send the welcome sequence. Keep consent status attached to the record so contacts only get campaigns they opted into.
Measure performance and improve your first-party data program
Track conversion, drop-off, and downstream lead quality
Once your form is live, don’t just let it sit there. Watch where people bail and whether the leads that come through turn into pipeline.
Track the full path:
- How many people view the form
- How many start it
- How many finish it
For SaaS, lead volume alone doesn’t tell you much. Lead quality downstream matters more. That means paying close attention to MQL-to-SQL rate and demo-to-opportunity conversion.
Field-level and step-level drop-off data can point you to the problem fast. If one field or one step keeps causing people to quit, that’s your fix list. Use analytics to spot the biggest friction points, then work on the changes most likely to move the numbers.
Use progressive profiling to collect more data over time
Once you know which fields help drive conversion, save the rest for later. Start small: ask for email and first name, and add company only when you need it.
Then collect more details over time, like role, team size, and use case. You can do that through:
- Onboarding surveys
- In-app prompts after a user hits a milestone
- An email preference center
This approach tends to work better than dumping everything into multi-step forms instead of one long form. SaaS companies using it reportedly see 42% higher lead-to-customer conversion than those relying on a single long form.
One more rule here: only ask for data that’s missing from the CRM. If someone already gave you the answer, they shouldn’t have to type it in again.
FAQs
When should I use progressive profiling?
Use progressive profiling when you need to collect more lead information over time without overwhelming people or causing them to abandon your form.
Start by asking for only the details you need most. Then, as the relationship grows, collect more information bit by bit.
This approach helps you build a more complete profile while keeping trust intact and asking for the right details at the right moment.
How many fields should a SaaS form have?
There’s no fixed number. The goal is to balance lead qualification with user experience so fewer people drop off before they finish.
Start with the fields that matter most for qualification and personalization. If you can ask for less and still learn what you need, that’s usually the better move.
Features like form enrichment can also help. They can hide fields that are already filled from other data sources, so you can collect the data you need with less friction and stronger completion rates.
What consent checkboxes do I need?
Use only the checkboxes you need to get explicit, informed consent.
Be clear about what the user is agreeing to. Skip dense legal language. Link to your privacy policy, and keep a record of consent.
If you plan to send messages or contact someone by phone, say that plainly. Clear consent helps build trust and can help lower legal risk.
Related Blog Posts
Get new content delivered straight to your inbox

The Response
Updates on the Reform platform, insights on optimizing conversion rates, and tips to craft forms that convert.




Drive real results with form optimizations
Tested across hundreds of experiments, our strategies deliver a 215% lift in qualified leads for B2B and SaaS companies.
