

Google Forms to ActiveCampaign: Lead Tagging


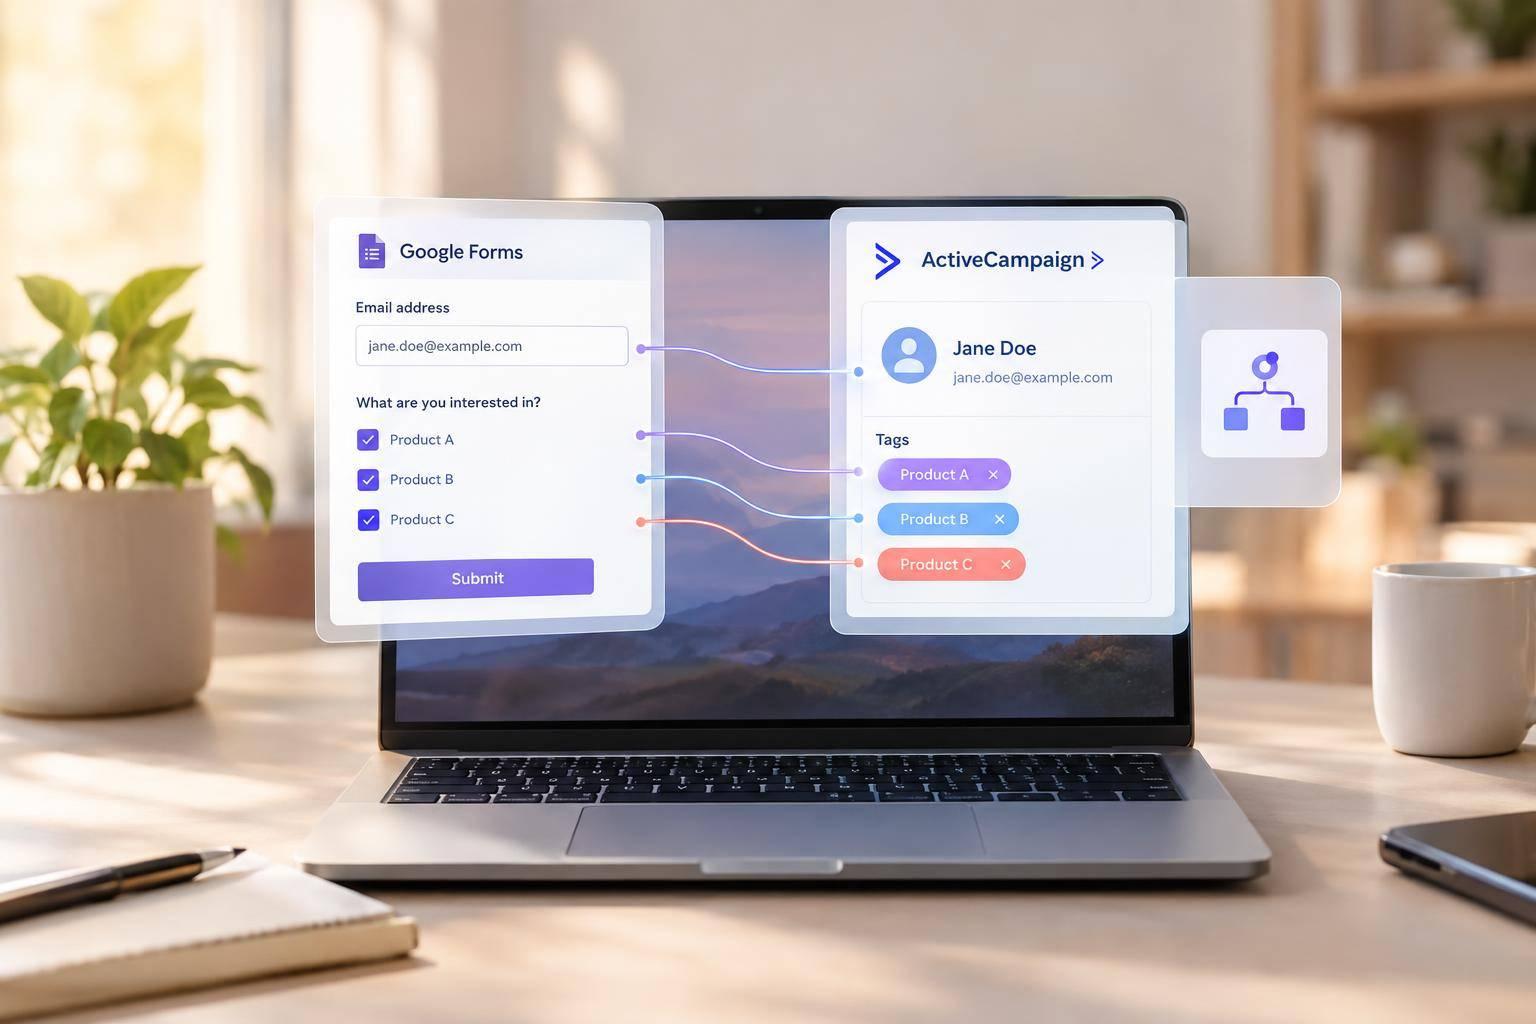
To tag ActiveCampaign leads from Google Forms, use an integration to match contacts by email and turn answers into tags. For example, “Product A” can apply interest-product-a and start a product-specific follow-up.
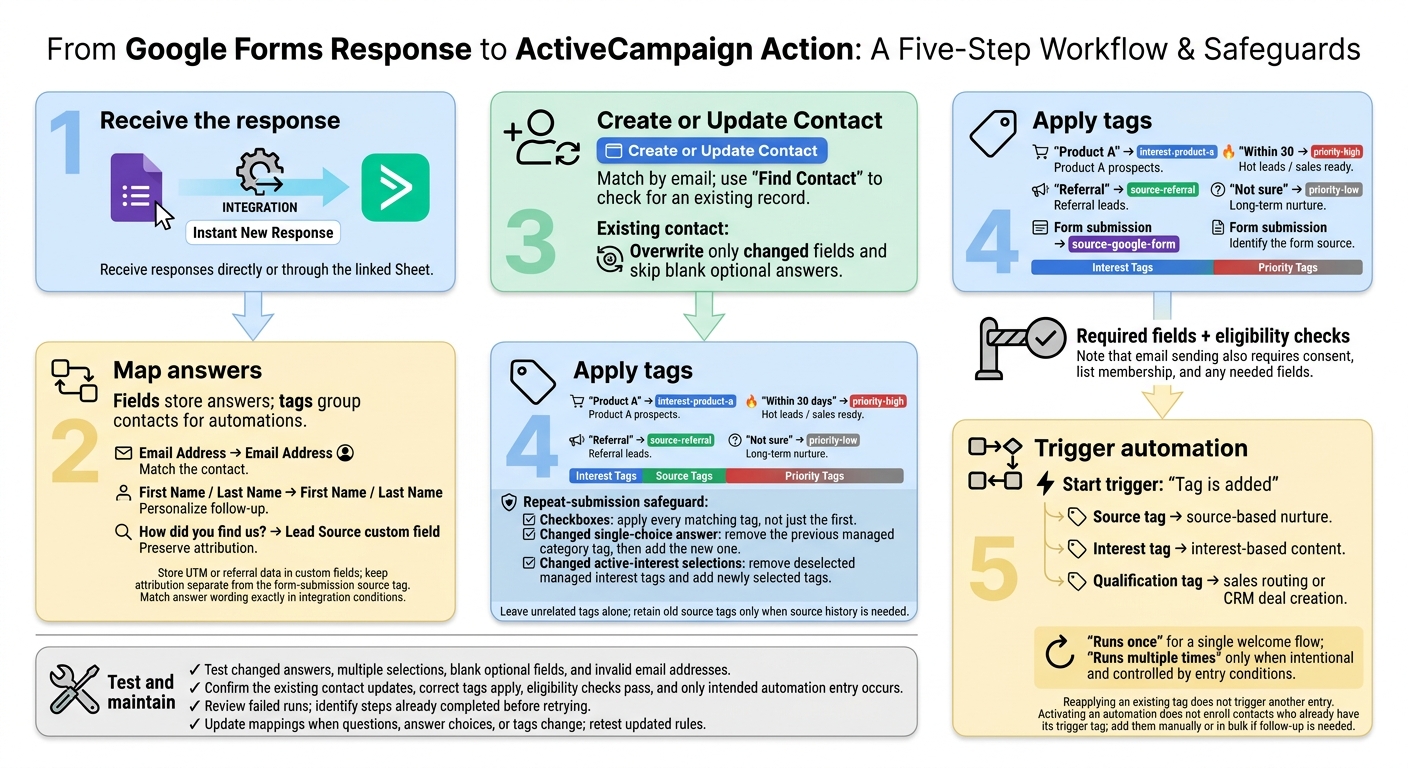
The setup has 5 steps: receive the response, map answers, create or update the contact, apply tags, and trigger automation.
- Set clear rules: Store answers in fields and use separate tags for interests, sources, and sales priority.
- Handle repeat submissions: Skip blank answers, apply every selected interest, and remove only outdated tags managed by the workflow.
- Control follow-up: Check consent and required fields before automation starts. Allow repeat entry only when needed.
- Test and maintain: Check changed answers, failed runs, and automation entry. Update rules when form choices change.
For multi-step forms that need more features, Reform offers options such as conditional routing and email validation, with an integration path to ActiveCampaign.
Google Forms to ActiveCampaign: 5-Step Lead Tagging
1. Set Up Contact Fields, Tags, and the Integration
Connect Google Forms answers to ActiveCampaign fields and tags so they can drive follow-up automations. Give the integration read access to the form responses or linked Sheet, plus write access to contacts, fields, and tags in ActiveCampaign. Use an Instant New Response trigger and a Create or Update Contact action. Then map each answer to a field update or tag rule.
Define Contact Fields and Tag Names
Use fields to store answers and tags to group contacts for automations. Create fields for names, interests, source, and qualification answers.
Use a consistent tag format such as
interest-product-afor an interest group,source-google-formfor form source, andpriority-highfor a qualification segment.
Keep the submission source separate from attribution data. Apply source-google-form to identify form submissions, and store UTM or referral data in custom fields.
Connect Form Responses to Contact Updates
Map each form answer to its destination in ActiveCampaign. Match contacts by email, and use a Find Contact step to check whether a record already exists.
Use this map to separate field updates from tag rules.
| Google Forms field | ActiveCampaign destination | Data type | Tagging purpose |
|---|---|---|---|
| Email Address | Email Address | Match the contact | |
| First Name / Last Name | First Name / Last Name | Text | Personalize follow-up |
| Primary Interest | Tag(s) | Text/List | Trigger interest-based automations |
| How did you find us? | Lead Source custom field | Text/dropdown | Preserve attribution |
| Qualification Answer | Tag(s) | Choice/Text | Segment by priority or lead score |
| Form submission | source-google-form tag |
Tag | Identify the form source |
For existing contacts, overwrite only changed fields, skip blank answers, and add new tags without replacing those already on the record. Use the field map to apply tags based on answer rules.
sbb-itb-5f36581
2. Set Tagging Rules for Form Answers
Match Interests, Sources, and Qualification Answers to Tags
Map each exact answer to a tag. Store the original answer in a custom field only if you need it for reporting or future rule changes. Keep source attribution separate from the form itself, with one field for the source and another for the source tag.
| Form answer | Condition | ActiveCampaign tag | Resulting segment |
|---|---|---|---|
| Product A | Answer equals “Product A” | interest-product-a |
Product A prospects |
| Referral | Answer equals “Referral” | source-referral |
Referral leads |
| Within 30 days | Answer equals “Within 30 days” | priority-high |
Hot leads / sales ready |
| Not sure | Answer equals “Not sure” | priority-low |
Long-term nurture |
Use identical wording in Google Forms and the integration’s conditions. Then set rules for contacts who select multiple answers or change a previous answer.
Handle Multiple Selections and Changed Answers
Apply one tag for each single-choice answer. For checkboxes, parse answers as comma-separated values so the workflow applies every matching tag, not just the first.
When answers change, remove only outdated tags that this workflow manages. Leave unrelated tags alone. For single-choice fields, remove the previous category tag before adding the new one. For checkboxes that track active interests, remove managed interest tags that are no longer selected and add any newly selected tags. Skip blank optional answers so empty values don’t overwrite existing contact data.
Keep old source tags only if you need source history.
After applying the tags, use them to route contacts into the right ActiveCampaign automation path.
3. Trigger ActiveCampaign Automations With Tags
Choose Automation Paths by Tag Category
Once your workflow applies the right tag, ActiveCampaign can send the contact into the matching automation.
Set Tag is added as the automation’s start trigger, then select the tag that starts follow-up. Keep acquisition source, content interests, and sales priority in separate tag groups so contacts enter the right path.
| Tag category | Recommended use | Automation trigger |
|---|---|---|
| Source-based | Send contacts to source-based nurture | Source tag added → source-based nurture |
| Interest-based | Deliver relevant content | Interest tag added → interest-based content |
| Qualification-based | Send qualified leads to sales | Qualification tag added → sales routing or CRM deal creation |
Apply the trigger tag only after required fields are filled in and eligibility checks pass. Before sending email, also require consent, list membership, and any needed fields.
Next, set the rules for who can enter the automation again.
Manage Repeat Entry and Contacts With Existing Tags
Choose Runs once for a single welcome flow. Use Runs multiple times only when you want contacts to reenter, and add entry conditions to limit who qualifies. Reapplying a tag that’s already on a contact won’t trigger another entry.
Activating an automation does not enroll contacts who already have its trigger tag. If those contacts still need follow-up, add them manually or in bulk.
4. Test and Maintain the Tagging Workflow
Test Answers, Repeat Submissions, and Automation Entry
Once the tag rules and automation paths are set up, test them with controlled submissions. Have test contacts submit interactive flows with different answer combinations, leave optional fields blank, and enter invalid email addresses. Follow each submission through the integration to ActiveCampaign and check that the correct tags apply.
Submit the same email again with changed answers. Confirm that the existing record updates, blank optional fields don’t overwrite stored data, and tags change as expected.
For each test contact, check consent, tag-triggered entry, and branch selection. Repeat the submission to make sure only the intended tag updates fire, with no duplicate automation entry. Fix any mapping errors these tests reveal before going live.
Review Failed Runs and Update Rules
Compare failed runs with the submitted answers and the contact records they reached. Check for broken tag mapping, duplicate records, and incorrect automation entry. Before retrying a run, identify which steps already succeeded so you don’t repeat contact updates or automation entry.
Update the mapping whenever a question, answer choice, or tag changes. Retest only the updated rules.
5. Consider Reform for Additional Form Features
If Google Forms limits your tagging logic, Reform offers branded multi-step forms, conditional routing, lead enrichment, spam prevention, and email validation before responses reach ActiveCampaign. These features help keep tags clean and reduce bad records.
Use fixed-choice answers for interests and qualification, plus hidden fields for UTM data. This helps each response map neatly to tags and contact fields.
Map the integration path before building the form. Connect Reform’s New Response trigger to ActiveCampaign through Zapier or webhooks. Then route the response to Create or Update Contact, tag actions, or automation entry.
Conclusion: Check Contact Data, Tags, and Follow-Up
Before publishing, check that you have the correct contact record. Confirm that Create or Update Contact updates the existing record for that email and that each form answer adds the right tag and starts the right automation.
Submit one final test using the same email with updated answers. Check that the tags update and the contact enters the automation. Keep repeat entry off unless re-entry is required.
After launch, review failed runs. Fix any missing fields, tags, or automation entries before retrying.
FAQs
Can I assign tags using multiple form answers?
Yes, you can assign multiple tags based on different form answers. When setting up your integration, add a source tag to every submission so you know which form it came from. Then, add tags for the answers that matter to your follow-up.
For example, an industry selection and a budget range can each add a matching tag in ActiveCampaign. Use those tags to trigger automations or segment contacts for more targeted follow-up.
How do I prevent conflicting lead-source tags?
Use consistent tag names, such as form:demo-request. Apply one lead-source tag, such as reform-general-lead, and use additional tags only for separate qualification criteria.
Map your form’s email field to ActiveCampaign’s standard Email property so repeat submissions update the existing contact instead of creating duplicates. Check your automation triggers to make sure tags are applied consistently during the final submission sync.
What if a lead qualifies for multiple automations?
If a lead meets the trigger criteria for multiple automations in ActiveCampaign, they’ll enter every matching workflow. Use conditional logic or filters to keep your CRM tidy and prevent conflicting messages. This lets contacts move forward only when they meet the criteria you set.
You can also apply multiple tags based on form responses. Then, use the combination of tags on each contact’s record to control which automations they enter and which paths they follow.
Related Blog Posts
Get new content delivered straight to your inbox

The Response
Updates on the Reform platform, insights on optimizing conversion rates, and tips to craft forms that convert.



Drive real results with form optimizations
Tested across hundreds of experiments, our strategies deliver a 215% lift in qualified leads for B2B and SaaS companies.
