

How Dynamics 365 Form Submissions Trigger Journeys


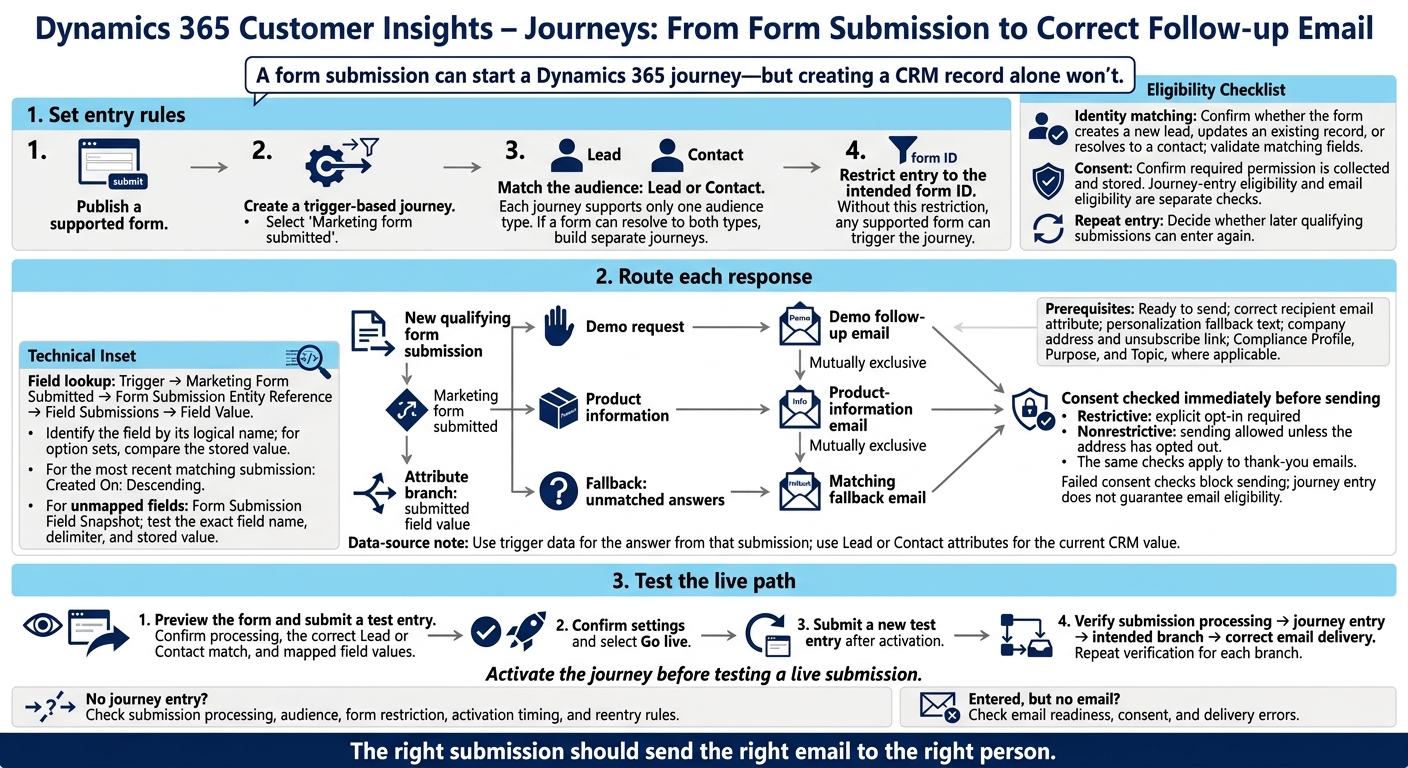
A form submission can start a Dynamics 365 journey - but creating a CRM record alone won’t. Publish a supported form, select Marketing form submitted in a trigger-based journey, and restrict entry to the intended form ID.
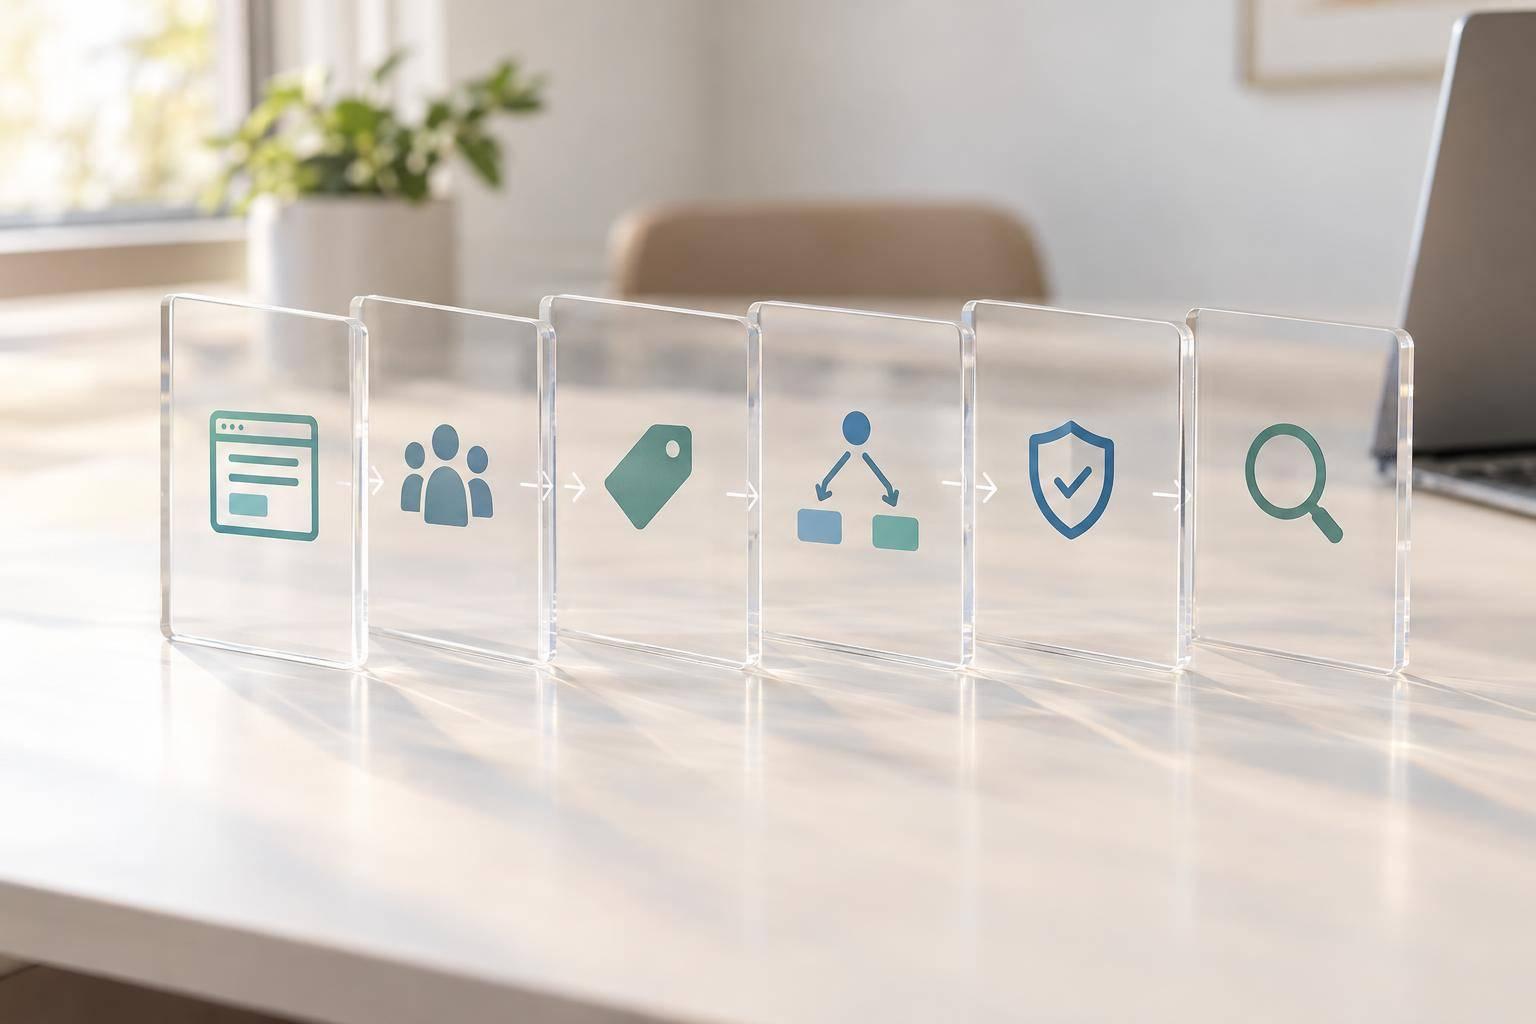
The setup has three parts:
- Set entry rules. Match the Lead or Contact audience, check record matching, and decide whether repeat submissions can enter again.
- Route each response. Branch by submitted answers and connect each path to a ready-to-send email. Check consent and email settings before sending.
- Test the live path. Activate the journey, submit a new test entry, and confirm record matching, journey entry, branch selection, and email delivery.
The goal is simple: the right submission should send the right email to the right person.
Dynamics 365: Form Submission to Journey Email
How to Use Customer Insights Journeys in Dynamics 365
sbb-itb-5f36581
1. Set the Audience and Submission Trigger
Create a new trigger-based journey in Customer Insights - Journeys, then select Marketing form submitted. Set the audience and form rules before defining how the journey branches after entry.
Match the Audience and Restrict Entry by Form
Choose Lead or Contact based on the record type the form submission creates or resolves. Each journey supports only one audience type. If a form can resolve to both types, build separate journeys. An audience mismatch can block entry without showing an error.
In the trigger configuration, select the intended form using its form ID. Without this restriction, any supported form can trigger the journey.
Check Identity, Consent, and Reentry Settings
Even a valid submission can fail audience matching or consent checks. Review these settings before building any email path.
| Setting | Required check | Risk if missed |
|---|---|---|
| Audience | Match Lead or Contact to the form’s resolved record type. | Expected participants may not enter. |
| Form restriction | Require the intended form ID. | Other supported forms may trigger the journey. |
| Identity matching | Check whether the form creates a new lead, updates an existing record, or resolves to a contact. Confirm that the matching fields contain valid values. | The submission may create or update the wrong record, or fail to resolve a journey participant. |
| Consent | Confirm that the form collects and stores the required permission. Check journey-entry eligibility separately from consent to receive the planned email type. | Entry does not guarantee email eligibility. Promotional email may be blocked or sent contrary to policy. |
| Repeat entry | Use the available reentry controls to set whether later qualifying submissions can enter again. | People may receive duplicate promotions or miss a response to a new request. |
With the entry rules set, add branches based on the submitted values that should determine each email path.
2. Add Branches and Follow-Up Emails
Once a submission qualifies, route it by answer and connect it to the matching email.
Branch by Submitted Values
Add an Attribute branch immediately after the trigger to check the submitted field value. Find it under Trigger → Marketing Form Submitted → Form Submission Entity Reference → Field Submissions → Field Value. Identify the field by its logical name. For option sets, compare the stored value. When you need the most recent matching submission, filter by Created On: Descending.
Create mutually exclusive Demo request and Product information paths, plus a Fallback path for unmatched answers. Use trigger data to check the answer from that submission. Use a lead or contact attribute to check the current CRM value instead. For unmapped fields, use Form Submission Field Snapshot, and test the exact field name, delimiter, and stored value before publishing.
End each branch with the email that matches the submitted value.
Prepare Emails for Each Path
Create one email per path. Add the content, links, and personalization fields, then mark it Ready to send before adding Send an email. Connect Demo request to the demo follow-up and Product information to the product-information email. Include fallback text for optional values, and complete required checks, such as the company address and unsubscribe link.
In each email action, select the recipient attribute that holds the intended email address. Set the email’s Compliance Profile, Purpose, and Topic, where applicable.
Consent is checked immediately before sending. Restrictive enforcement requires explicit opt-in. Nonrestrictive enforcement allows sending unless the address has opted out. Apply these same checks to thank-you emails.
3. Test and Activate the Journey
Test the Form and Record Matching
Before going live, check that a submission matches the right record and saves the expected field values.
Preview the form and submit a test entry. Confirm that it processes, matches the correct lead or contact, and writes the mapped values to the expected fields.
Check Settings and Go Live
Once record matching works, confirm that the earlier settings are complete, then select Go live to activate the journey. You can then test the full path from submission to email.
Test the Active Submission-to-Email Path
Activate the journey before testing a live submission. Then submit a new test entry and verify that it enters the journey, follows the intended branch, and receives the correct email.
Check Entry and Delivery
Review the first live submissions to check submission processing, journey entry, branch progression, and email delivery.
If a submission doesn't enter the journey, check submission processing, audience, form restriction, activation timing, and reentry rules. If it enters but no email arrives, check email readiness, consent, and delivery errors.
Conclusion: Verify the Submission-to-Email Path
Check the full submission-to-email path. Confirm the email is ready, then send a live test submission. Verify that it reaches the intended audience, enters the journey, and delivers the correct email for each branch.
A CRM record alone doesn’t prove the form trigger fired or the flow works. If the submission doesn’t produce the right email, the journey isn’t working end to end.
FAQs
Can earlier submissions enter a newly activated journey?
Before activating a journey, check whether contacts who already meet its trigger criteria will enroll automatically. To exclude past submissions, narrow the trigger settings or limit enrollment to submissions received after activation. If you want to manage enrollment manually, use a controlled backfill plan.
Before going live, review your audience and test with tagged records. Confirm that only the intended contacts enter the journey so you don’t send unwanted or duplicate messages.
How can I prevent duplicate emails from repeat submissions?
Use your CRM’s deduplication tools to match submissions by email address and update existing records rather than create new ones. Enroll each contact in a nurture sequence no more than once every 30 days, and save processed submission IDs to prevent repeat triggers.
Before launch, submit the same email address twice to check that a duplicate nurture sequence doesn’t start. Before each send, recheck the contact’s eligibility, including subscription status or conversion history.
What happens if someone submits different answers twice?
Use CRM duplicate management and re-enrollment rules. Reform checks each submitted email against CRM records. If it finds a match, it updates that record instead of creating a duplicate.
Before turning on the workflow, decide whether repeat submissions should change an active sequence or trigger a higher-priority path. Store processed submission IDs and limit re-enrollment - say, to once every 30 days - to prevent duplicate nurture sequences. Test these scenarios before publishing.
Related Blog Posts
Get new content delivered straight to your inbox

The Response
Updates on the Reform platform, insights on optimizing conversion rates, and tips to craft forms that convert.

Drive real results with form optimizations
Tested across hundreds of experiments, our strategies deliver a 215% lift in qualified leads for B2B and SaaS companies.
