

HubSpot Event Registration Automation: Guide


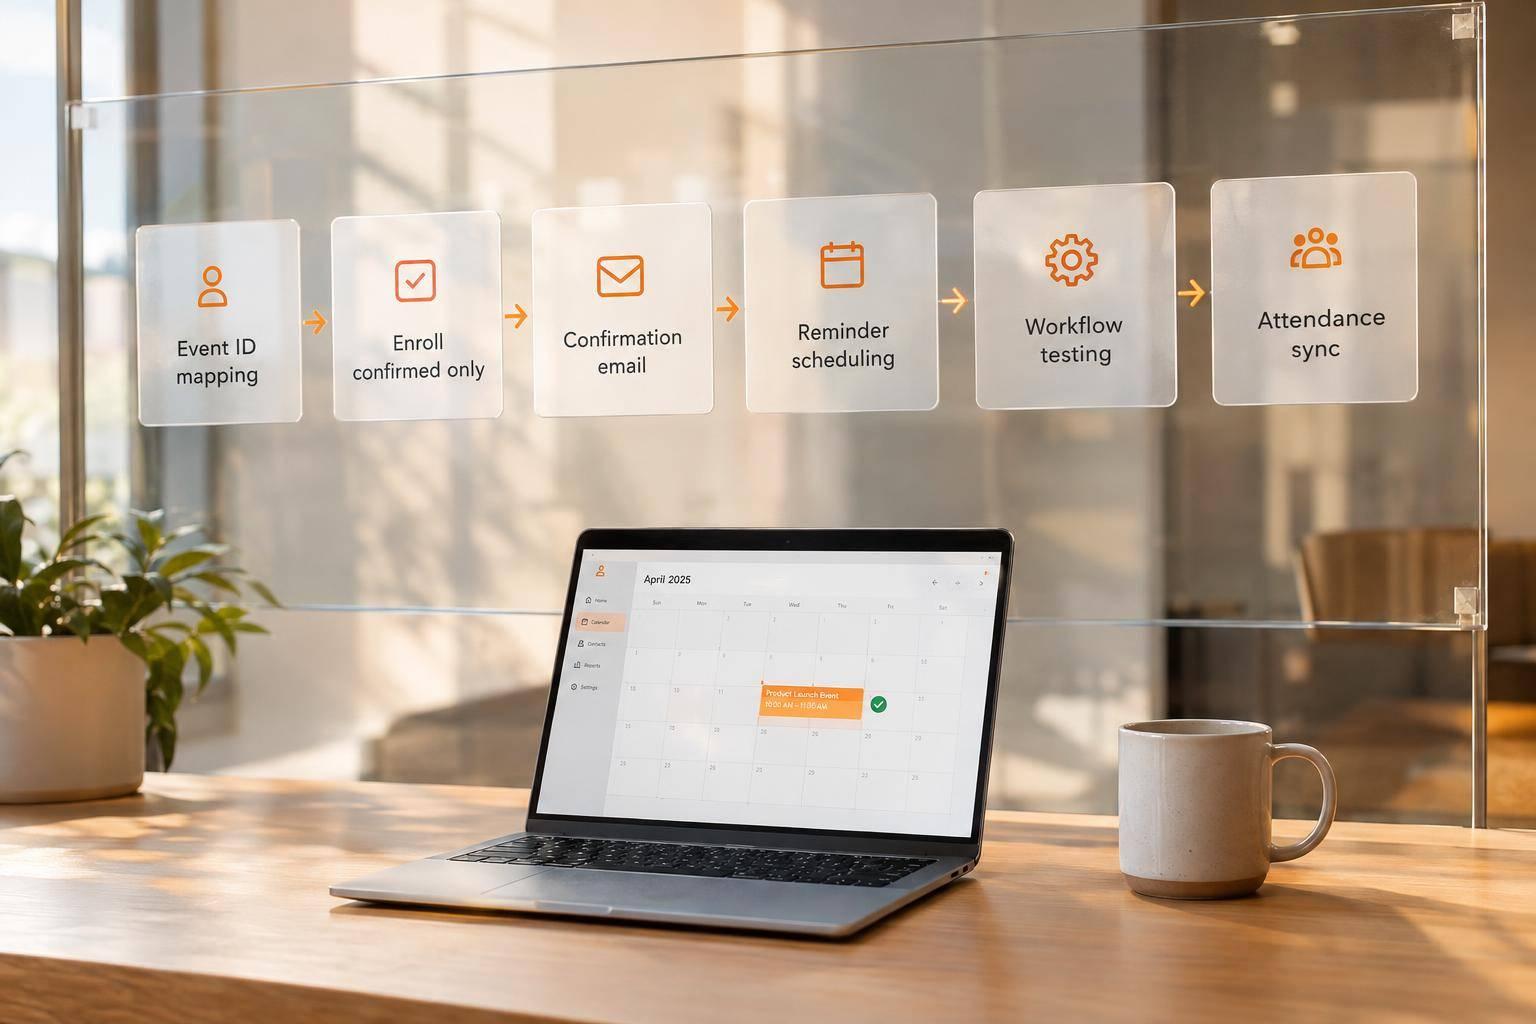
I start HubSpot event automation with one rule: confirm the registration before sending a confirmation. Give each event its own ID, then use that ID to connect form submissions, contact updates, emails, attendance, and reports.
In this guide, I cover how to:
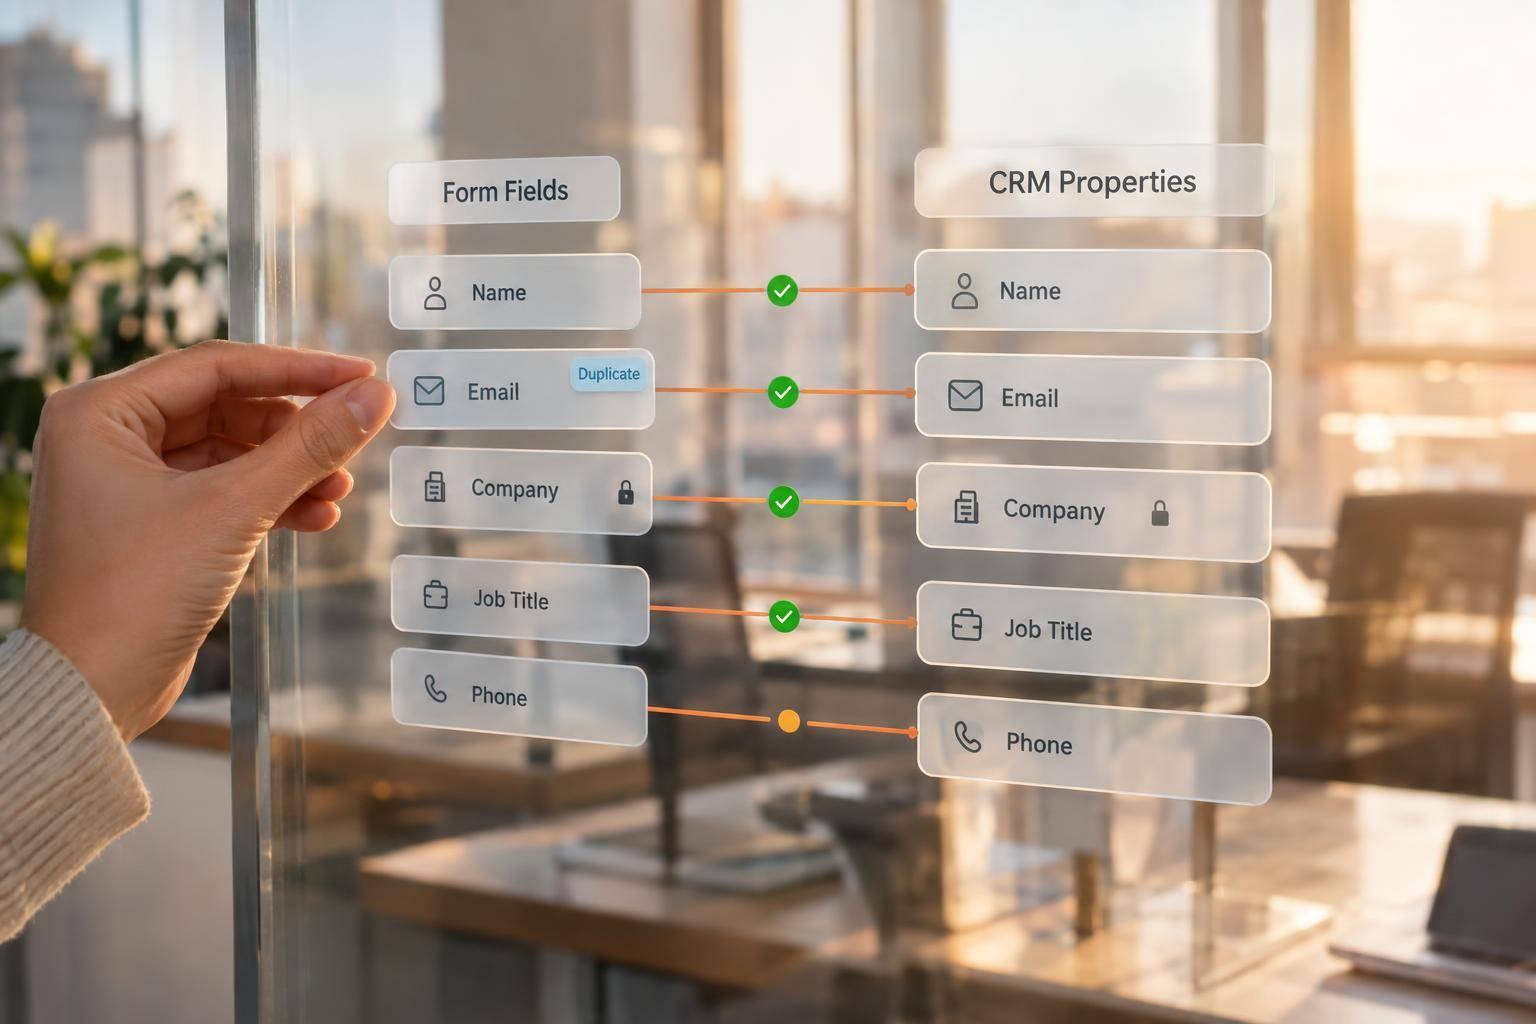
- Check HubSpot access, connect Reform, and map registration fields.
- Set workflow triggers, prevent duplicate messages, and handle waitlists, cancellations, and failed syncs.
- Schedule event emails while keeping registration messages separate from marketing consent.
- Test the flow, sync attendance, and report on registrations and revenue.
Before launch, I test the entire path. Then I review the first 10–20 live registrations to check that <u>each confirmed registration matches its HubSpot record and email history</u>.
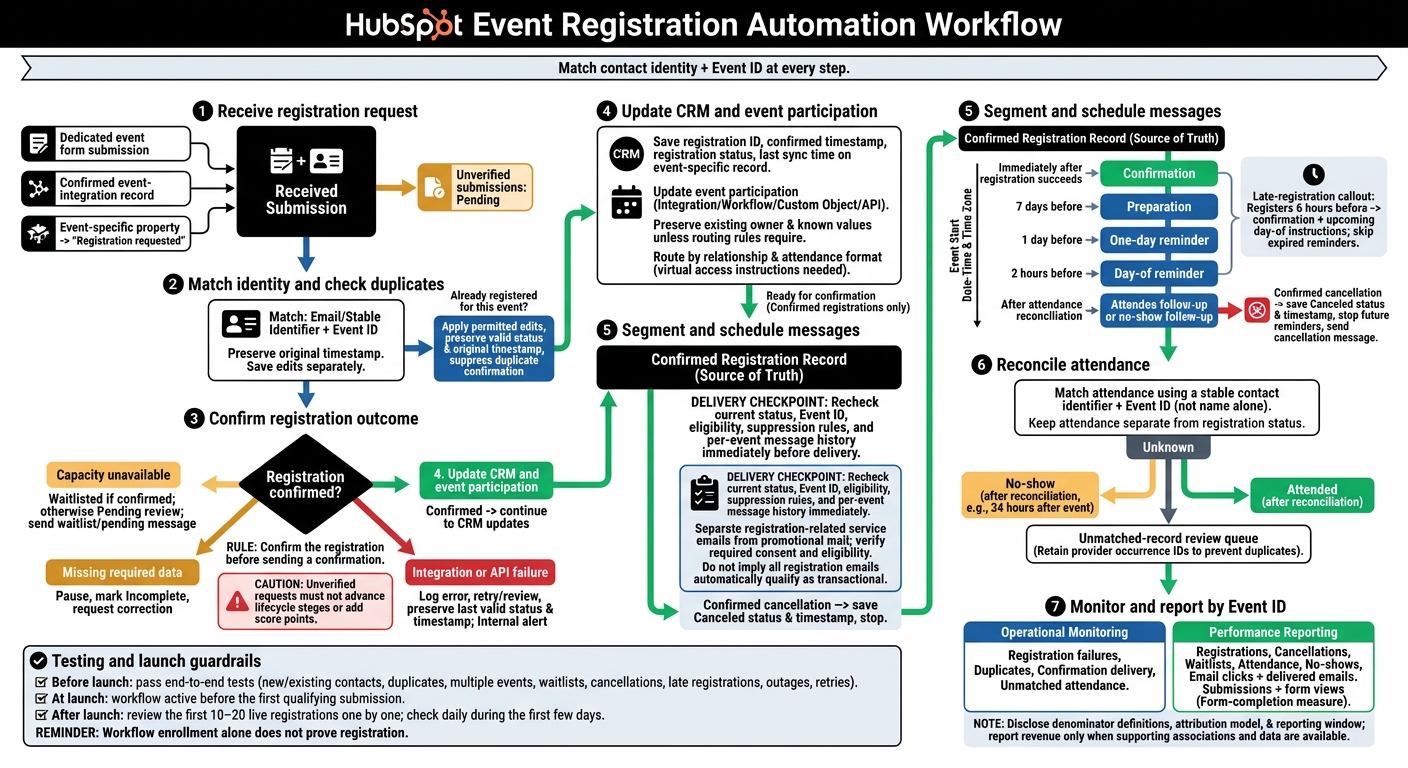
HubSpot Event Registration Automation Workflow
How to Sync Event Registrants to HubSpot Marketing Events using HubSpot Workflows
sbb-itb-5f36581
Build Your HubSpot Registration Workflow
Once your form is live, send only confirmed registrations into downstream HubSpot workflows. Follow this sequence: enrollment, duplicate check, CRM updates, participation sync, branching, and message handoff. Track the Event ID at every step, and treat each submission as pending until the registration system confirms it.
Set Enrollment and Re-enrollment Rules
Choose a trigger that represents a registration request: submission of the event’s dedicated multi-step HubSpot form, receipt of a confirmed event-integration record, or an event-specific property changing to “Registration requested.” For form-based enrollment, use the form submission as the trigger and match records by email and Event ID. If you share a form across events, filter for the intended event. Multiple event triggers use OR logic; filters use AND logic. Test after activation - an event can be missed if it happens before the contact exists.
Before taking any registration action, match the contact’s identity to the Event ID. Keep the original request timestamp and save edits separately. Suppress duplicate confirmations without changing a valid registration status.
Enable re-enrollment only when another submission should trigger a new event action. HubSpot allows re-enrollment after a record completes the workflow, based on selected trigger conditions. Track each Event ID separately, and wait for confirmed registration status before updating the record.
Update CRM Records and Event Participation
After registration succeeds, save the registration ID, confirmed timestamp, status, and last synchronization time on the event-specific record. Update participation through the approved integration, workflow action, custom object, or API. HubSpot’s event-attendance endpoints support registered, attended, and canceled states. If synchronization fails, preserve the last valid status and source timestamp.
Apply company-association rules and keep the existing owner unless routing rules call for a change. Create sales tasks only for qualified follow-up. An unverified request should not advance lifecycle stages or add score points.
After CRM updates, branch by outcome, attendee type, and exception state.
Add Branches for Registrant Types and Exceptions
Check exceptions before routing follow-up, and set a fallback path. HubSpot checks branches in order and does not reroute records when properties change later.
Use separate branches for registration outcome, relationship, and attendance format so virtual attendees receive access instructions. Send only confirmed registrations to a “Ready for confirmation” handoff, and check consent and suppression rules before sending marketing messages.
| Condition | Workflow action | CRM update | Communication path |
|---|---|---|---|
| New contact; confirmed registration | Complete registration | Save registration ID, Registered status, and timestamp | Confirmation handoff |
| Already registered for this event | Apply permitted edits; stop duplicate actions | Keep status and original timestamp | Suppress duplicate confirmation |
| Same contact; different Event ID | Process separately | Create or update that event’s record | Confirmation after success |
| Capacity unavailable | Follow capacity system’s result | Waitlisted if confirmed; otherwise Pending review | Waitlist or pending message |
| Customer or prospect | Route by relationship | Preserve known values, owner, and lifecycle unless rules require changes | Relationship-specific follow-up |
| Target-account registrant | Notify owner or create qualified follow-up task | Apply verified company association | Internal sales alert plus operational email |
| In-person, virtual, or hybrid | Route by confirmed format | Save attendance format | Venue or access instructions |
| Confirmed cancellation | Stop future reminders | Save Canceled status and timestamp | Cancellation message |
| Missing required data | Pause; request correction | Mark Incomplete; identify missing fields | Correction request |
| Integration or API failure | Log failure; retry or review | Record error and retry state; preserve last valid status | Internal alert, not confirmation |
Use confirmed registrations for list segmentation and email scheduling. Apply suppression rules before sending.
Segment Registrants and Schedule Event Emails
Create Event-Specific Lists and Segments
Use the confirmed registration record as the source of truth for every segment and send. Store the Event ID on that same record. Active segments should track only states that can change: confirmed, waitlisted, canceled, attended, and no-show. Segments determine who can receive a message; they don’t replace the registration record.
Reserve static segments for exports or closed campaign lists. Keep attendance set to Unknown until reconciliation, then change it to Attended or No-show. Use an unconfirmed segment only while approval, payment, or another check is pending.
Base follow-up on attendance status, not engagement. Use the attendance format on the event record to tailor venue or access instructions.
Schedule Confirmations, Reminders, and Follow-up Emails
Store the event start as a date-time value in the event’s time zone. Schedule sends using relative delays from that timestamp, and check daylight saving behavior around the March and November clock changes.
Once you’ve defined the segment, schedule each message using the event start time.
| Timing | Audience and trigger | Personalization | Suppression rules | |
|---|---|---|---|---|
| Confirmation | Immediately after registration succeeds | Matching Event ID; status becomes Confirmed | Event title, date, time zone, format, calendar option, cancellation instructions | Failed registration, cancellation, prior identical confirmation |
| Preparation | 7 days before | Confirmed registrants; scheduled delay completes | Agenda, preparation checklist, venue or access details | Waitlisted, canceled, already sent |
| One-day reminder | 1 day before | Confirmed registrants; scheduled delay completes | Start time, time zone, logistics | Ineligible recipient, changed status, already sent |
| Day-of reminder | 2 hours before | Still-confirmed registrants; two-hour reminder becomes due | Join link or arrival instructions, support contact | Canceled, already sent, event started |
| Attendee follow-up | After attendance reconciliation | Matching Event ID; outcome is Attended | Recording, resources, survey | Unverified attendance, prior send, missing required consent |
| No-show follow-up | After attendance reconciliation | Matching Event ID; outcome is No-show | Recording or future-event invitation | Attendees, canceled registrations, ineligible promotional recipients |
Add a late-registration branch to skip send times that have already passed.
Someone registering six hours before the event should receive confirmation and the upcoming day-of instructions, not the seven-day preparation email.
Check current status and per-event message history immediately before delivery. Don’t assume an expired date delay will skip its email safely.
Set Consent and Email Suppression Rules
Check consent and suppression rules before every send. Keep registration-related service emails separate from promotional mail, and verify consent and recipient eligibility before delivery.
Suppress canceled, opted-out, bounced, duplicate, and already-sent contacts. An event email doesn’t qualify as transactional simply because it serves a registration-related purpose.
Test your Registration Flow and Measure Results
Run Prelaunch Registration Tests
Before launch, test the registration path from start to finish. Cover new and existing contacts, duplicate submissions, multi-event registrants, waitlists, cancellations, late registrations, outages, and retries of failed steps.
Check Event ID and registration status first. Then verify the submission, contact updates, list membership, workflow enrollment, CRM activity, email send, consent, and attendance status.
Use HubSpot’s workflow testing tools to check whether a record meets enrollment criteria and how it moves through the workflow. Review workflow history and CRM property history, too. Compare form submissions, confirmed registrations, and registrations saved to the record for the same event and time period. Document every difference. Workflow enrollment alone doesn't prove registration - the registration record or status field must also be written.
Use test contacts with clearly labeled email addresses:
qa+test1@yourdomain.com
Remove test records before launch reporting. Use that same test set to check attendance sync and reporting outputs.
Sync Attendance and Reconcile Event Statuses
Once registration works as expected, check how attendance enters HubSpot. Define which system controls attendance and when it syncs. Tie every attendance update to the same event record used for workflows and emails.
Match records with a stable contact identifier, such as a HubSpot contact ID or verified email address, and always include the Event ID. Don't match on name alone. Create a queue for unmatched records and retain provider occurrence IDs so retries don't create duplicate attendance events.
Keep attendance updates separate from registration status changes. Set a no-show cutoff, such as 24 hours after the event, and record who makes any late attendance corrections.
Report on Registration, Attendance, and Revenue
After reconciling registration and attendance, measure results by event. Separate day-to-day monitoring from performance reporting, and filter every view by Event ID.
For day-to-day monitoring, track registration failures, duplicate records, confirmation delivery, and unmatched attendance. For performance reporting, track:
- Submissions ÷ form views, plus registrations by source and segment.
- Cancellations, waitlists, attendance, and no-shows. State whether the attendance denominator includes or excludes cancellations.
- Email clicks ÷ delivered emails.
Form analytics may come from Reform rather than HubSpot. Document the source and don't combine metrics that use incompatible counting rules.
Report meetings, opportunities, and revenue only when HubSpot permissions, lifecycle data, attribution settings, contact-to-deal associations, and enough conversion time support those metrics. Where possible, also filter by registration date, attendance status, source, and segment.
Disclose the attribution model and reporting window. Separate event-influenced outcomes from event-sourced outcomes. Label incomplete associations as not yet associated rather than automatically counting them as zero.
Fix Missing Data and Duplicate Messages
Trace failures from submission to send. Check validation, identity matching, mappings, permissions, integration responses, enrollment, and email actions. If totals don't match, also check Event IDs, enrollment filters, sync timing, re-enrollment rules, and metric definitions.
Treat failed and duplicate sends as record-level issues, not just email issues. For repeated messages, inspect duplicate contacts, overlapping workflows, re-enrollment triggers, and retries.
Assign owners for alerts and failed-record review. Retry only failed steps, using the Event ID plus the submission or provider ID as an idempotency key. Check message history before sending again.
Conclusion: Launch and Monitor Your Registration Flow
Once testing and reporting are in place, launch only after end-to-end testing passes. Make sure the workflow is active before the first qualifying submission.
Review the first 10–20 live registrations one by one, then check daily during the first few days. Compare submissions against HubSpot records and confirmation emails to spot missing updates or duplicate sends early.
During the first week, save baseline metrics for form completion and follow-up results. After that week, use those early results to adjust the workflow. Change one variable at a time, such as a required field or reminder timing, and save both the baseline metrics and the workflow version.
FAQs
Which HubSpot plan do I need for event automation?
You’ll need a HubSpot plan with automation and workflow tools, generally available on the Professional and Enterprise tiers. These tools let you build contact-based workflows that start when someone submits a form. From there, you can run nurture sequences, use conditional branching, and update CRM records automatically.
How should I store registrations for recurring events?
Skip separate properties for every event - they can clutter your setup and cause reporting issues. Instead, use one set of custom contact properties to store the event identifier, such as a slug, and the registration date.
Enable re-enrollment in HubSpot workflows so contacts can repeat the sequence each time they register. Add hidden fields to your Reform forms to collect event metadata, then map those values to your custom properties.
What happens to scheduled emails if my event is rescheduled?
Emails already scheduled by your existing HubSpot workflow won’t automatically shift to the new event date.
Use an event date property, such as webinar/event date, to enroll contacts in the reminder sequence. Update that property, then rerun the workflow or adjust its timing so reminders are recalculated for the new schedule.
Related Blog Posts
Get new content delivered straight to your inbox

The Response
Updates on the Reform platform, insights on optimizing conversion rates, and tips to craft forms that convert.


Drive real results with form optimizations
Tested across hundreds of experiments, our strategies deliver a 215% lift in qualified leads for B2B and SaaS companies.
