
.webp)
DSAR Intake Form: Build Checklist


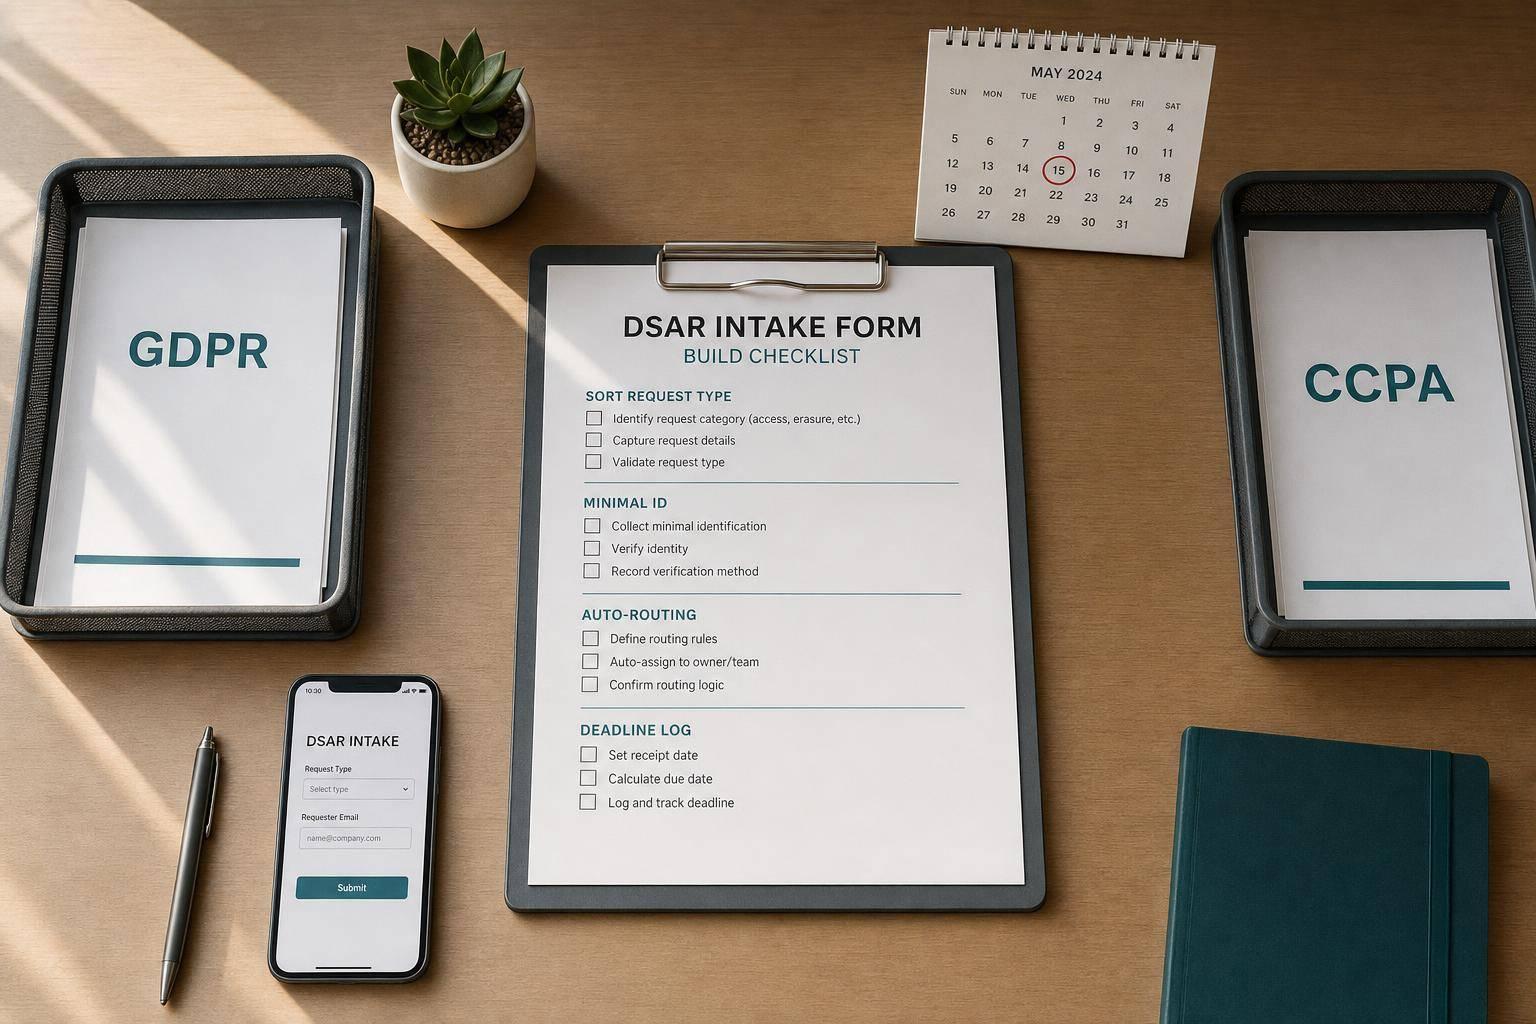
A DSAR form is not a contact form. If it misses request type, identity checks, routing, or deadline tracking, your team can lose time on a request that may carry a 1-month GDPR deadline or a 45-day CCPA deadline.
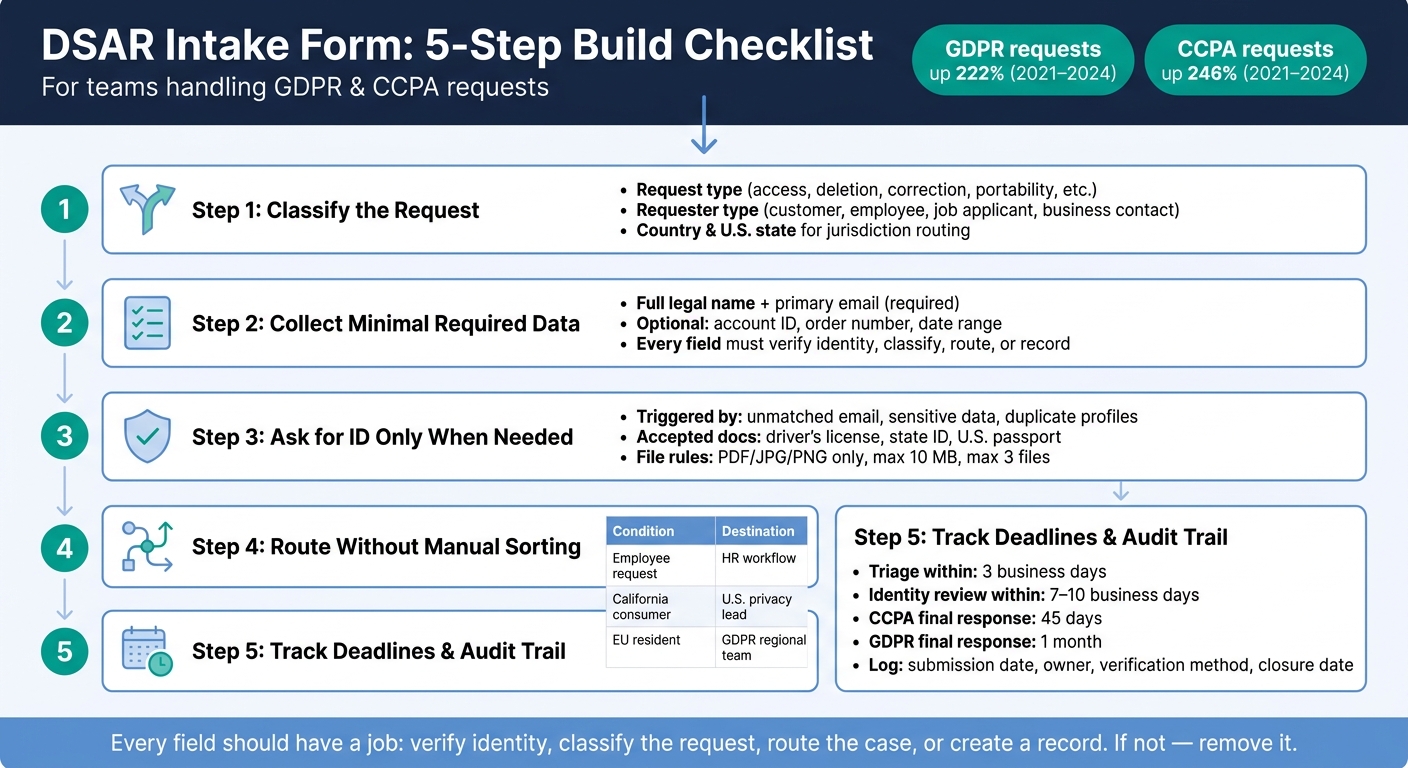
Here’s the short version: if I were building a DSAR intake form for a U.S. team handling GDPR and U.S. privacy requests, I’d make sure it does five jobs from the start:
- Sort the request by right type, requester type, and location
- Collect only the data needed to find records and confirm identity
- Ask for ID only when there’s reason to doubt identity
- Send each case to the right team without manual sorting
- Log dates, checks, and decisions for audit and follow-up
A few numbers show why this matters:
- GDPR-related requests grew 222% from 2021 to 2024
- CCPA requests grew 246%
- ID files should be kept for no more than 30 days after verification
- Teams should aim to triage within 3 business days
- Identity review should land within 7–10 business days
If I had to boil the article down even more, I’d say this: every field on the multi-step form should have a job. It should help verify identity, classify the request, route the case, or create a record. If not, I’d remove it.
Below is the quick checklist the article points to:
- Request options for access, correction, deletion, portability, restriction, objection, consent withdrawal, and California opt-out
- Early screening to send billing or support issues somewhere else
- Requester type fields like customer, employee, job applicant, business contact, or other
- Country and U.S. state fields for legal handling
- Required name and email, plus optional account or order references
- Conditional file upload for ID proof with PDF, JPG, and PNG only
- Spam controls like CAPTCHA and rate limits
- Auto-confirmation with a reference number and expected response date
- Case records with timestamps, owners, verification notes, and closure data
- Quarterly form review and checks after legal or process changes
This article is, at its core, a build list for making a DSAR form simple for the person filing it and usable for the team handling it.
DSAR Intake Form: 5-Step Build Checklist for GDPR & CCPA Compliance
1. Define request categories and scope
Map each privacy right to a clear request option
Use plain, action-first labels so people can pick the right request without wading through legal terms. The label shouldn't just name a right. It should also drive routing, deadlines, and who owns the request inside your company.
Include these options:
- Access my data - you'll receive a report of the personal information we hold about you
- Correct my data - we'll update inaccurate or incomplete information
- Delete my data - we'll remove your personal data where we're required to do so
- Get a copy of my data - you'll receive your data in a portable, machine-readable format
- Restrict how my data is processed - we'll limit certain uses of your data while your request is reviewed
- Object to certain processing - we'll stop specific uses of your data where permitted
- Withdraw my consent - we'll stop processing based on your earlier consent
- Opt out of sale or sharing of my data - for California residents under CCPA/CPRA, routed separately from deletion
Put Delete my data near the top. In many programs, deletion requests make up a big share of the volume, so it helps to surface that option early.
Once the request type is clear, collect the requester details you need to route and verify it.
Add requester type and jurisdiction fields
Add a requester type field near the top of the form. This isn't just for recordkeeping. It helps your team triage the request from the start. Keep the list short: customer, employee, job applicant, business contact, other.
That one field can save a lot of back-and-forth. Employee requests usually pull from HR and payroll systems. Customer requests often touch CRM and billing. If you know the requester type up front, you can send the request to the right team right away instead of sorting it out later.
Collect country of residence and, for U.S. requesters, state of residence too. These fields decide which legal rules apply and which team should handle the request. Someone who selects United States and California should trigger CCPA/CPRA handling. Someone in an EU country should trigger GDPR timelines and rights like portability and objection.
With a tool like Reform, you can use conditional routing based on those fields. For example, a California consumer deletion request can go straight to a U.S. privacy lead, while an EU employee access request can go to an HR privacy contact. No manual triage needed.
Use these fields to route the request before it ever hits the main queue.
Redirect non-DSAR issues to the right channel
Add an early screening question: What do you want to do today? This is a simple way to separate privacy requests from everyday support issues before they pile into the same inbox.
Include both privacy request options and common non-privacy issues. If someone picks Get help with my account or Ask about a charge, show a short note that those requests are handled faster by the support team, then give them a direct link to the right place. Keep the message short, friendly, and clear.
Route non-DSAR issues out right away.
After that, collect the identity fields needed for valid requests.
sbb-itb-5f36581
2. Build required fields and identity verification steps
Collect core identification and contact details
Once the request type and jurisdiction are set, ask for only the information you need to confirm identity and locate the right record. In most cases, that means making full legal name and primary email address required. Add country and state or region only if they help route the request or match records.
Include a short description of the request so the person can explain which rights they want to use. If your company has customer accounts, it also makes sense to add an optional account ID, order number, or subscription ID field when those details are commonly used in your systems.
A few other fields can help without adding friction:
- Date range
- Product or service involved
- Account or transaction reference
Mark these clearly as optional with wording like Optional - helps us find your data faster. Skip government ID numbers, broad demographic details, and anything you would not normally use to find a record.
A simple gut check helps here: every field should do one of four things. It should verify identity, classify the request, route it to the right team, or create a documented record. If it does none of those, cut it.
Set rules for when proof of identity is required
Ask for ID only when there is reasonable doubt about who made the request. That means you should not require ID for every submission, including requests that come from logged-in accounts.
Write down your internal standard so your team handles cases the same way. A practical trigger list might include cases where the email address does not match any known account, the request involves sensitive data such as financial, health, or precise location data, or the details provided match more than one profile.
When extra proof is needed, accept driver's license, state ID card, or U.S. passport as the main documents. If you need address confirmation, a recent utility bill or bank statement is usually enough. For third-party representatives, such as attorneys, parents, or authorized agents, collect the data subject's details and the representative's details in separate fields. Also require written authorization, such as a signed consent form or power of attorney. Under CCPA/CPRA, authorized agents have specific statutory requirements, so your form instructions should point to those rules.
Under GDPR Article 12(6), if there is reasonable doubt and you ask for added proof, the response deadline starts only after identity has been properly established.
File uploads
Keep upload rules tight. Allow PDF, JPG, and PNG only. Set a file size limit of 10 MB per file and allow no more than three files total. Block executables and macro-enabled Office files.
Spell out the upload instructions right on the form. Tell requesters to cover their SSN and any unrelated information before uploading, and to send only what your team needs to review. That small step can save a lot of cleanup later. With Reform, you can set file type rules and size limits in one place, and use conditional logic so the upload field appears only when identity verification is triggered. In other words, most people never even see it.
Access to uploaded ID files should be limited to a small group on the privacy team. Log every access event, and set a deletion schedule of no more than 30 days after verification is done. Say this plainly in the form: We store identity documents only long enough to complete verification and comply with legal requirements, then securely delete them. California's Privacy Protection Agency specifically instructs businesses to delete any personal information collected for verification as soon as practical after processing the request.
Once these fields and controls are set, validation and routing can sort requests automatically and send them to the right place.
3. Add validation, spam controls, and routing logic
Use validation rules to reduce manual cleanup
Good validation cuts down on cleanup and helps you track each request from submission through closeout. The goal isn't to ask for more. It's to ask for the few fields that help with routing, verification, or recordkeeping, often by improving accessibility and reducing friction through better form structure.
At a minimum, use email format checks, make name and contact fields required, and use dropdowns for country and U.S. state instead of open text. Dropdowns cut spelling differences and make routing rules work better downstream.
For the description field, keep it tight. Add a character limit and helper text that tells people what your team needs to triage the request. That way, you get useful details instead of a long, messy narrative. Also add a required privacy notice acknowledgment checkbox before submission.
Error messages matter more than many teams think. Write them in plain language, and link each error to the right field so screen readers can announce it. That helps keep the form in line with ADA/WCAG accessibility expectations.
Once the form is clean, you can add controls that keep submissions usable and secure.
Block spam and suspicious submissions
A public DSAR form is an open door, and bots will test it. So don't rely on one control.
Use layers:
- CAPTCHA or a similar challenge, with an accessible fallback, to stop basic automation
- Rate limiting to block fast repeat submissions from one IP address or email domain
One without the other leaves gaps.
Spam isn't the only problem, either. Watch for patterns that look off: very fast form completion, repeated or meaningless text, near-duplicate submissions, or identity details that don't line up. When that happens, send the submission to manual review. That's a safer move than auto-rejecting a request that might be valid.
You should also warn people not to upload unrelated sensitive data unless you ask for it. That keeps intake cleaner and cuts accidental over-sharing.
After you block the obvious junk, the next step is simple: get each valid request to the right team.
Route by request type, requester type, and geography
Your form shouldn't just collect data. It should send requests where they need to go.
Build conditional logic around three things: what the person asked for, who they are, and where they're located.
| Dimension | Example condition | Destination |
|---|---|---|
| Request type | Access, deletion, correction, portability | Privacy operations queue |
| Request type | Billing dispute, product question | Customer support (with redirect message) |
| Requester type | Employee | HR workflow and internal identity checks |
| Geography | Jurisdiction requires different handling | Regional privacy team |
If a submission is clearly outside DSAR scope, show a redirect message instead of filing it as a privacy request. That keeps the privacy queue focused on actual privacy work.
Use form logic to route requests automatically.
Also list a postal address or dedicated email for people who can't use the web form.
Practical tips for dealing with Data Subject Access Requests
4. Set up confirmations, records, and internal deadlines
Once routing and verification are in place, finish the intake flow with confirmations, recordkeeping, and deadline tracking.
Send a confirmation with a reference number and timeline
When someone submits the form, show an on-screen confirmation and send an email receipt. Both should include the same core details: a unique reference number, the submission date (MM/DD/YYYY), a plain-language summary of the request type, and a clear note on what happens next.
That reference number should follow the case across every channel. Pass it into your case-management system, email templates, and follow-up messages so the request stays easy to track.
The confirmation should also show the receipt date and expected response date. Make sure the timeline matches the request selected. For California residents under CCPA/CPRA, set the state-specific deadline in the message. If you use Reform, the custom success page can dynamically display the specific right exercised and the expected next milestone.
Keep records of verification, decisions, and timestamps
For every routed case, record the submission, follow-up messages, identity checks, assignment history, decision basis, and closure date.
Timestamps matter here. Regulators and internal auditors may need to reconstruct the full life of a request, from intake through closure. So each key action should have a date, time, and named owner.
Store identity verification artifacts with care. Keep the verification log, including the identity verification method, date, and outcome. But delete actual document images once verification is confirmed, unless a specific legal rule says you must keep them. That gives you a useful record without piling up extra personal data.
Track deadlines and review the form on a set schedule
Set stage-based SLAs:
- Triage within 3 business days
- Identity verification within 7–10 business days
- Final response within the applicable legal deadline
Each stage should have an automated timestamp so no one has to rely on manual tracking. For jurisdiction-specific timelines, set SLA profiles tied to the geography field in your form so the right deadline applies to each request.
If you use Reform, integrations and webhooks can send each submission straight into a helpdesk or privacy platform, automatically creating a ticket with the reference number, timestamps, and request metadata.
Review the form itself at least quarterly, and again after any regulatory change or data-processing update. During each review, test every requester journey, including consumer, employee, business contact, and multi-jurisdiction cases. Also confirm that routing rules still work and that confirmation templates show the right timelines and contact details. Review the form quarterly and after any legal or process change.
Conclusion: A build checklist teams can use now
Before launch, do one last pass. A solid DSAR intake form should handle five jobs well: classify the request, collect only the data you need, verify identity in a proportionate way, route the request on its own, and log deadlines and actions.
For the person submitting the request, the form should feel simple and clear. For the compliance team, it should open a case, apply the right deadline, and record each step. In the U.S., that includes the 45-day response window under CCPA.
This setup is much easier to manage when the form and workflow run through automation. If you use Reform, features like conditional routing, email validation, spam prevention, and integrations can push each request into your case system with timestamps and key details.
After launch, keep the form up to date by checking performance and tracking legal changes. Review it after regulatory updates, new product launches, or expansion into a new state. It also helps to watch incomplete submissions and misrouted requests so you can spot weak points early.
FAQs
When should a DSAR form ask for ID?
Ask for formal ID only when it is needed and proportionate to confirm the requester’s identity. Don’t make broad ID requests by default.
Start with questions that only the person should know, like a past reference number or exact appointment details. That keeps the process privacy-first by collecting only the data you need.
What fields are required in a DSAR intake form?
Ask only for what you need to handle the request. If a field doesn’t help move things forward, make it optional or leave it out.
In most cases, basic details for verification are enough, such as a person’s name and contact information. You can also ask for reference numbers or key dates, but only when they help pin down the issue. Formal ID should be requested only when it’s strictly needed and proportionate to the situation.
How should DSAR requests be routed and tracked?
Route DSARs with least privilege and conditional routing. That means each submission goes only to the right team or case system based on the request category. No broad access. No sending requests all over the place “just in case.”
Document every destination and integration so it’s clear where each request can go and how data moves between systems. And when alerts go out, avoid putting personally identifiable information in plain-text email. Email should point people to the secure system, not carry sensitive data itself.
Track every request with audit logs for views, edits, exports, and deletions. Each log entry should include:
- Timestamps
- User IDs
- Submission IDs
- Actions taken
Store those logs in a secure location with role-based access control. Keep them as permanent records so you have a clear trail for compliance work and audits. When someone asks who accessed a request, what changed, or when data was exported, the answer should be in the log - not buried in guesswork.
Related Blog Posts
Get new content delivered straight to your inbox

The Response
Updates on the Reform platform, insights on optimizing conversion rates, and tips to craft forms that convert.




Drive real results with form optimizations
Tested across hundreds of experiments, our strategies deliver a 215% lift in qualified leads for B2B and SaaS companies.
